Classroom Christmas Favors

They are all little angels

This year more than ever we needed the Christmas Spirit! We all have been hard hit by COVID and as we go into the holidays it’s nice for the students to have activities to do rather than a bag full of sweets. Also, to prevent arguments over who’s bag belongs to who the problem is solved by personalizing each student’s bag with their photo on it!

Supplies:

  • Photos of the students. Again we have the best Kindergarten teacher who is so sweet to work with me on these fun holiday treats – she captured photos of each of these little angels (without masks this time!). As I was trying to achieve a ‘bobble head’ look and feel, I scaled the images of the student’s faces larger than I would when I printed them out.
  • Plain Kraft Paper Bags. I choose brown as it showed off the angel wing better, but you can use any color bag you like.
  • Blue felt. I picked up a couple of sheets of blue felt at the craft store to use as a body. These were easy to cut out as long narrow triangle shapes and trim them down accordingly.
  • Angel Wings. I found these cute fabric angel wings on Amazon. They come joined, but I cut them apart so I could get the effect that the angels are flying.
  • Stars. I also found these glittery foam stars on Amazon. They were easy to use as they were just peel and stick. If I were to do this again, I would go with a smaller size star. I tried finding smaller sizes online but unfortunately they were all sold out.
  • Feathers or feather boa. To give the look that our little angels are floating on a cloud, I picked up a thin feather boa off Amazon and cut it down and hot glued it to the bag. It feathers added the texture and 3D look I was aiming for, but be prepared to have a broom close by with a dustpan – those feathers go everywhere!
  • Yellow Yarn. I used a fuzzy yellow yarn for the halo to complete the look. This did not work out as well as I had hoped and they were the most challenging thing to adhere to the bag. I would probably work with a different material if I did this again.

Filling:

My daughter helped me pick up fun activities, toys, and treats to put in the holiday gift bags which included:

  • A halo headband
  • Christmas activity book and crayons
  • Candy cane
  • Reindeer stuffy
  • Stickers
  • Peppermint Chinese yoyo

Christmas Child’s handprint tree plate

christmas-handprint-plate-2016

Now that out 3 yr old son and 18 mo old daughter are older – I wanted to make something that allowed both of them to create together – after looking through Pinterest, the answer was a handprint tree, https://www.pinterest.com/pin/492649935267856/.

This is the first time our son and daughter have collaborated to make anything and/or do a craft together – the outcome was amazing!  And they were both SO good at working with each other during this project.  As always, it helped to have family and friends with us to do this … I had our son go first and painted his hand light green and put his hand print on the plate, then we painted our daughter’s little hand light green and had her put her hand on the plate … they had a great time and really enjoyed it.

I wasn’t sure how it was going to turn out but just went with the creative flow.  Adding the string of Christmas lights helped tie the shape of the tree together and adding the base with the planter grounded the image and gave it more structure.

What was a rainy day when we decided to do this craft turned into a fun afternoon with an ever lasting heirloom keepsake.

Materials:

$55.00 Plate

$ 0.00  Paint, brushes, firing provided by pottery place

=====

$55.00


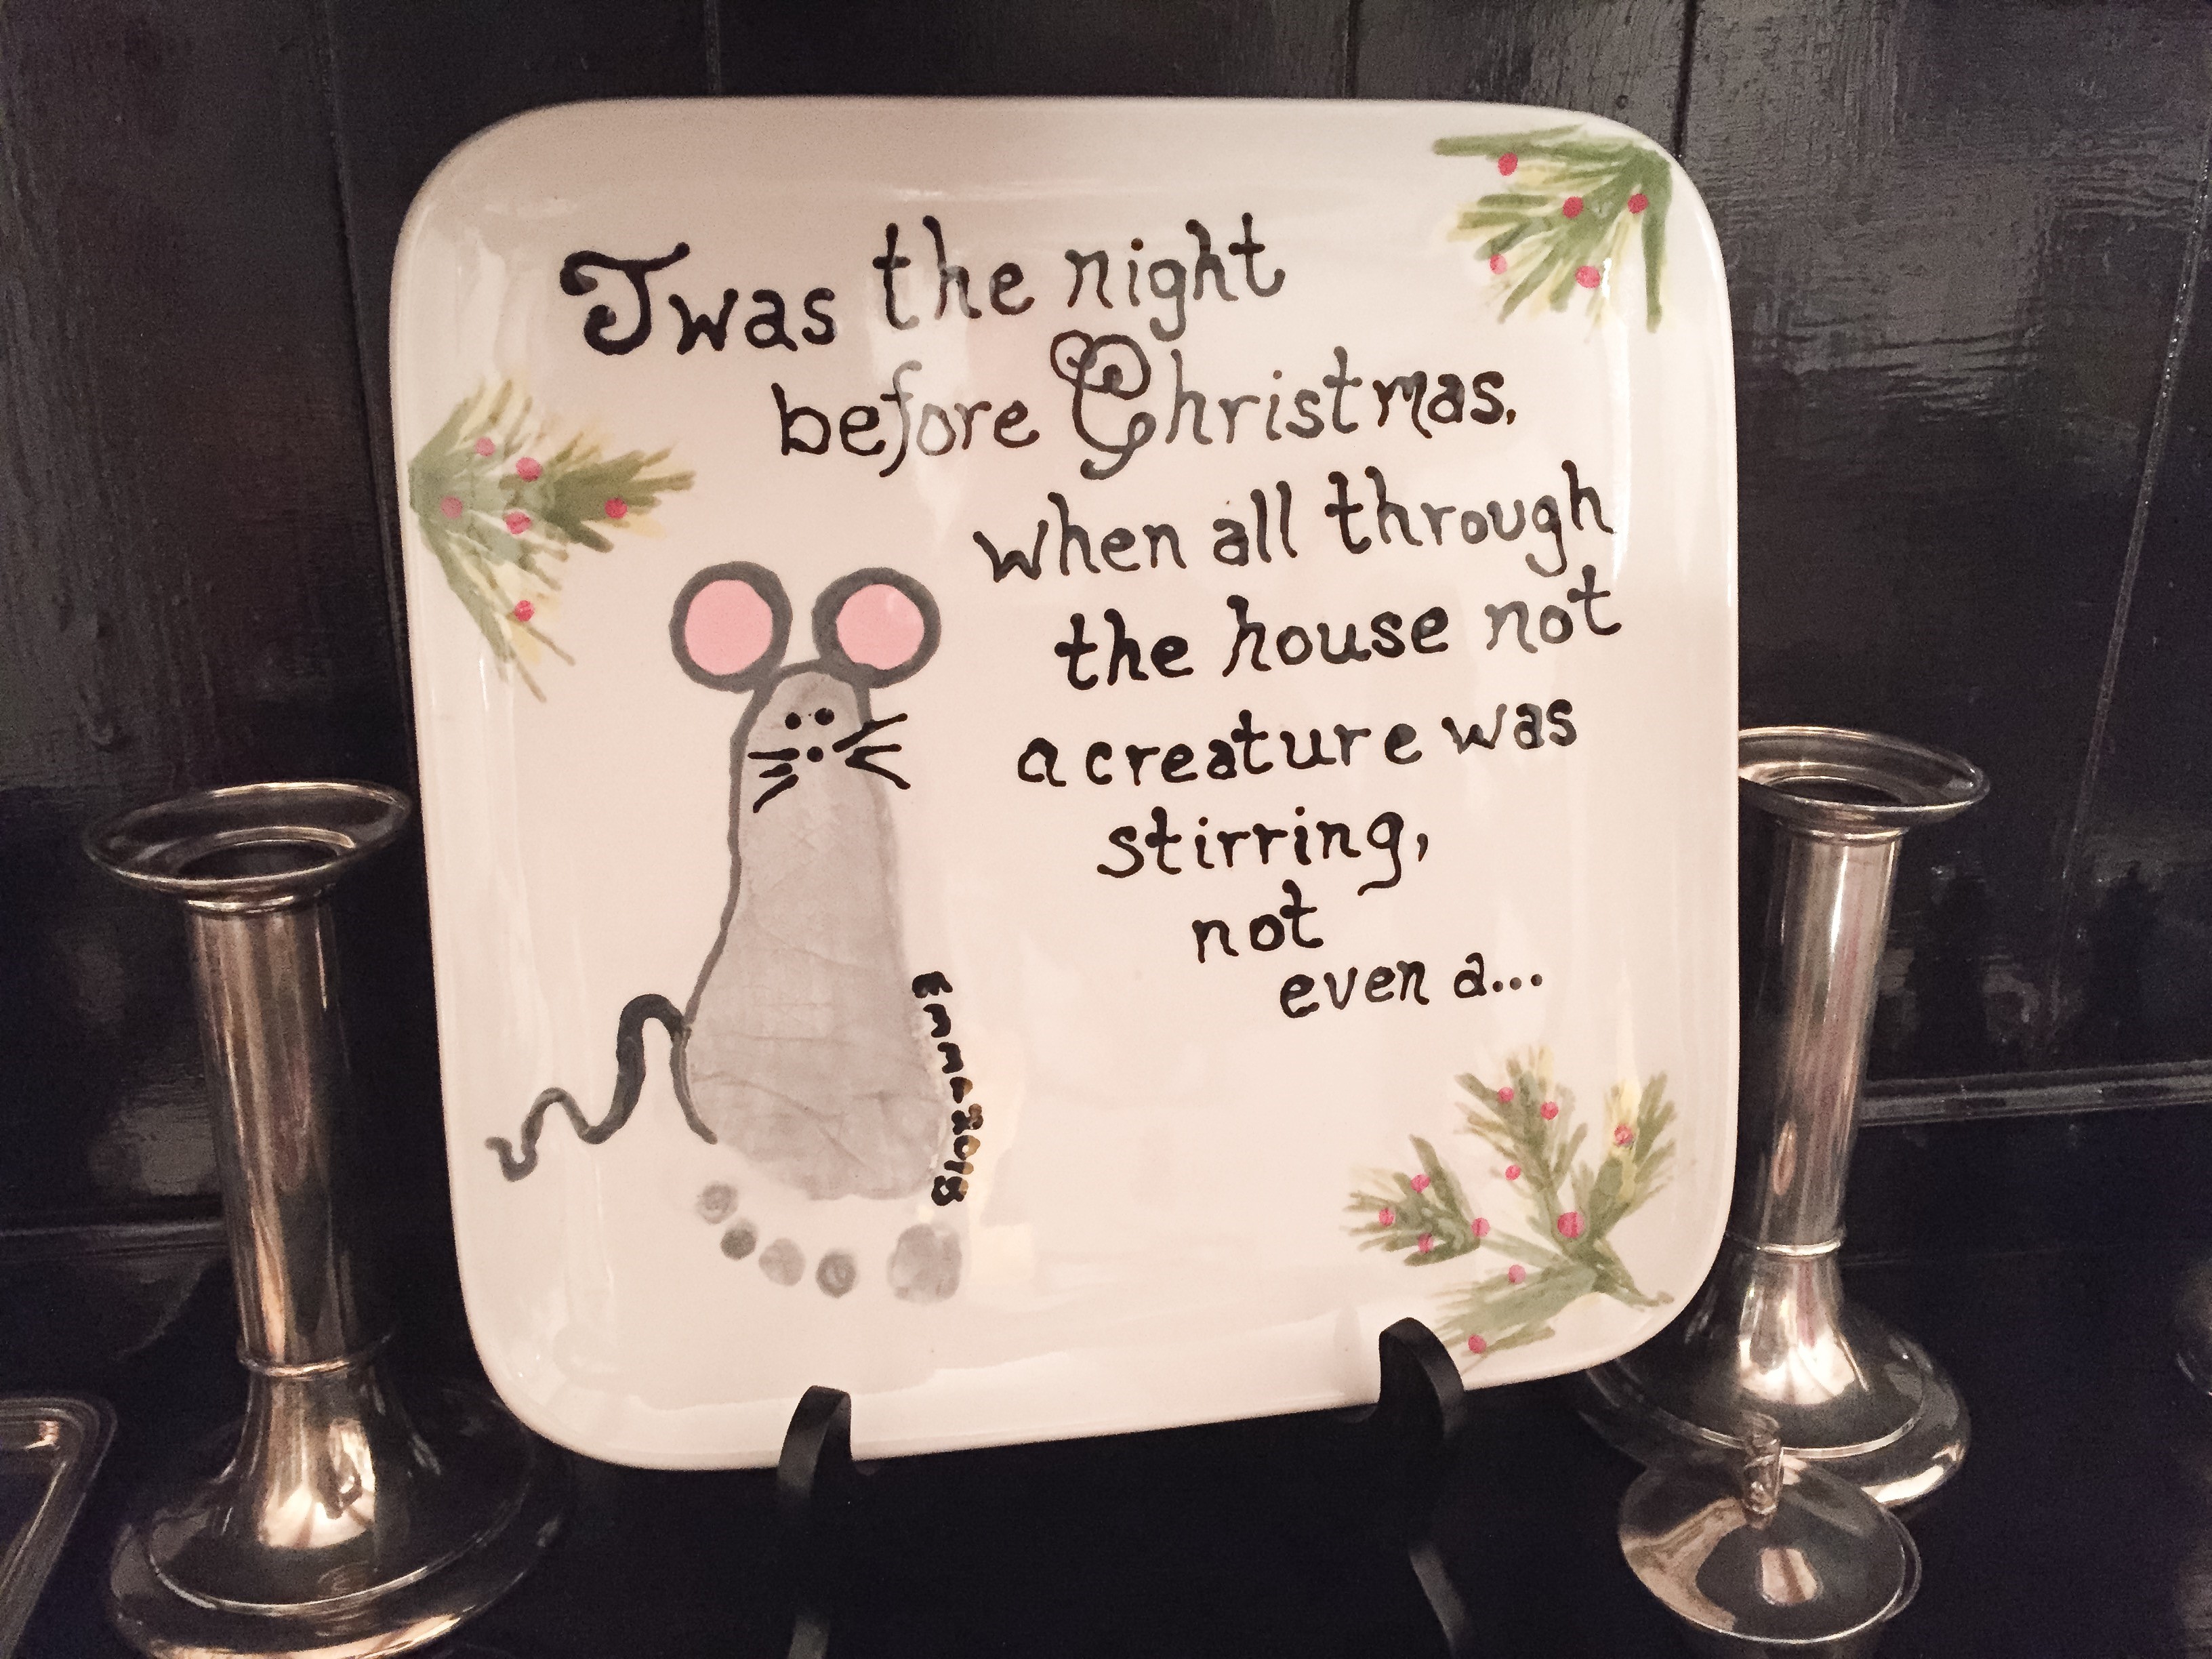
Child’s Twas the Night Before Christmas footprint craft plate

twa-the-night-before-christmas-plate

Inspired by the example I found on Pinterest (e.g: https://www.pinterest.com/pin/AerACqOOgQd6tS-NtpCksX_pxubR0R3i_dKwLLwhuY5oXGEEM_EwwRs/), I turned our  8 mo old daughter’s foot into a mouse in this heirloom 1st Christmas plate craft.

Our local pottery painting place is so sweet, they helped me work with my daughter to get the perfect footprint.  It took us about an hour to get the print and a week later we got the plate back.

Materials:
$25.00  pottery plate
$0          pottery place provided all paint/brush supplies and cost for firing plate.
======
$25.00


Old fashioned Christmas Tree Décor

old-fashioned-christmas-2015

As a working mother of two toddlers, I hardly have enough time to shop let a lone wrap gifts, bake, decorate, and do all the fun things that I enjoy doing over the holidays.  Keeping our Christmas tree decorations simple helps!  Especially by keeping all the breakable ornaments off and just putting on wood and fabric ornaments make a huge different to our piece of mind when it comes to keeping our kiddos safe.

I used a plaid table cloth for the tree skirt and simple ribbons to make bows that we just placed scattered on the tree.  For garland we use some silver broad ribbon and gathered it at the top in lieu of an angel.  This was as baby proof as we could get for our daughter’s first Christmas Tree.

Pinterest inspiration: https://www.pinterest.com/pin/207306389073127182/

Materials:

$80.00  Fresh cut Christmas Tree

======

$80.00


Image

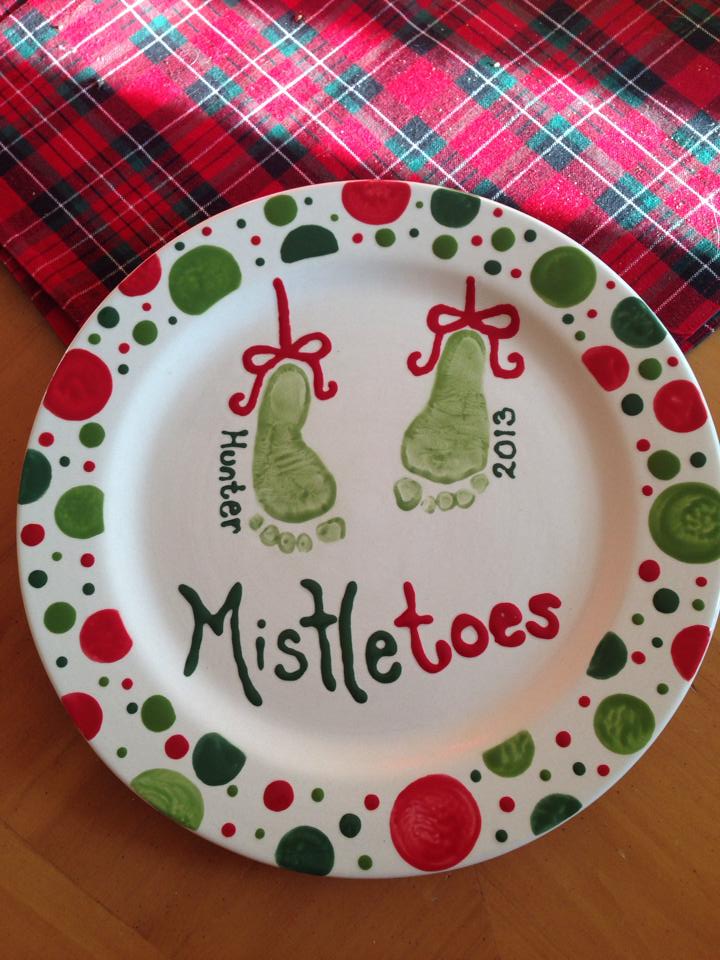
Mistletoes Baby Footprint Plate

Mistletoes Baby Footprint Plate

I got this idea from Pinterest. We just had a baby boy and wanted to create a heirloom for his first Christmas so I went to the local ‘paint your own pottery’ place in Redmond, WA. The original display on Pinterest (http://www.pinterest.com/pin/212654413628779538/) was on a square plate, but round works just as well …

My son was not too happy having his feet painted to look like the Grinch … but it was worth the little bit of fuss he kicked up to have this wonderful plate! The Grandparents liked it so much we made them each one as well.

Total Cost $35.00