
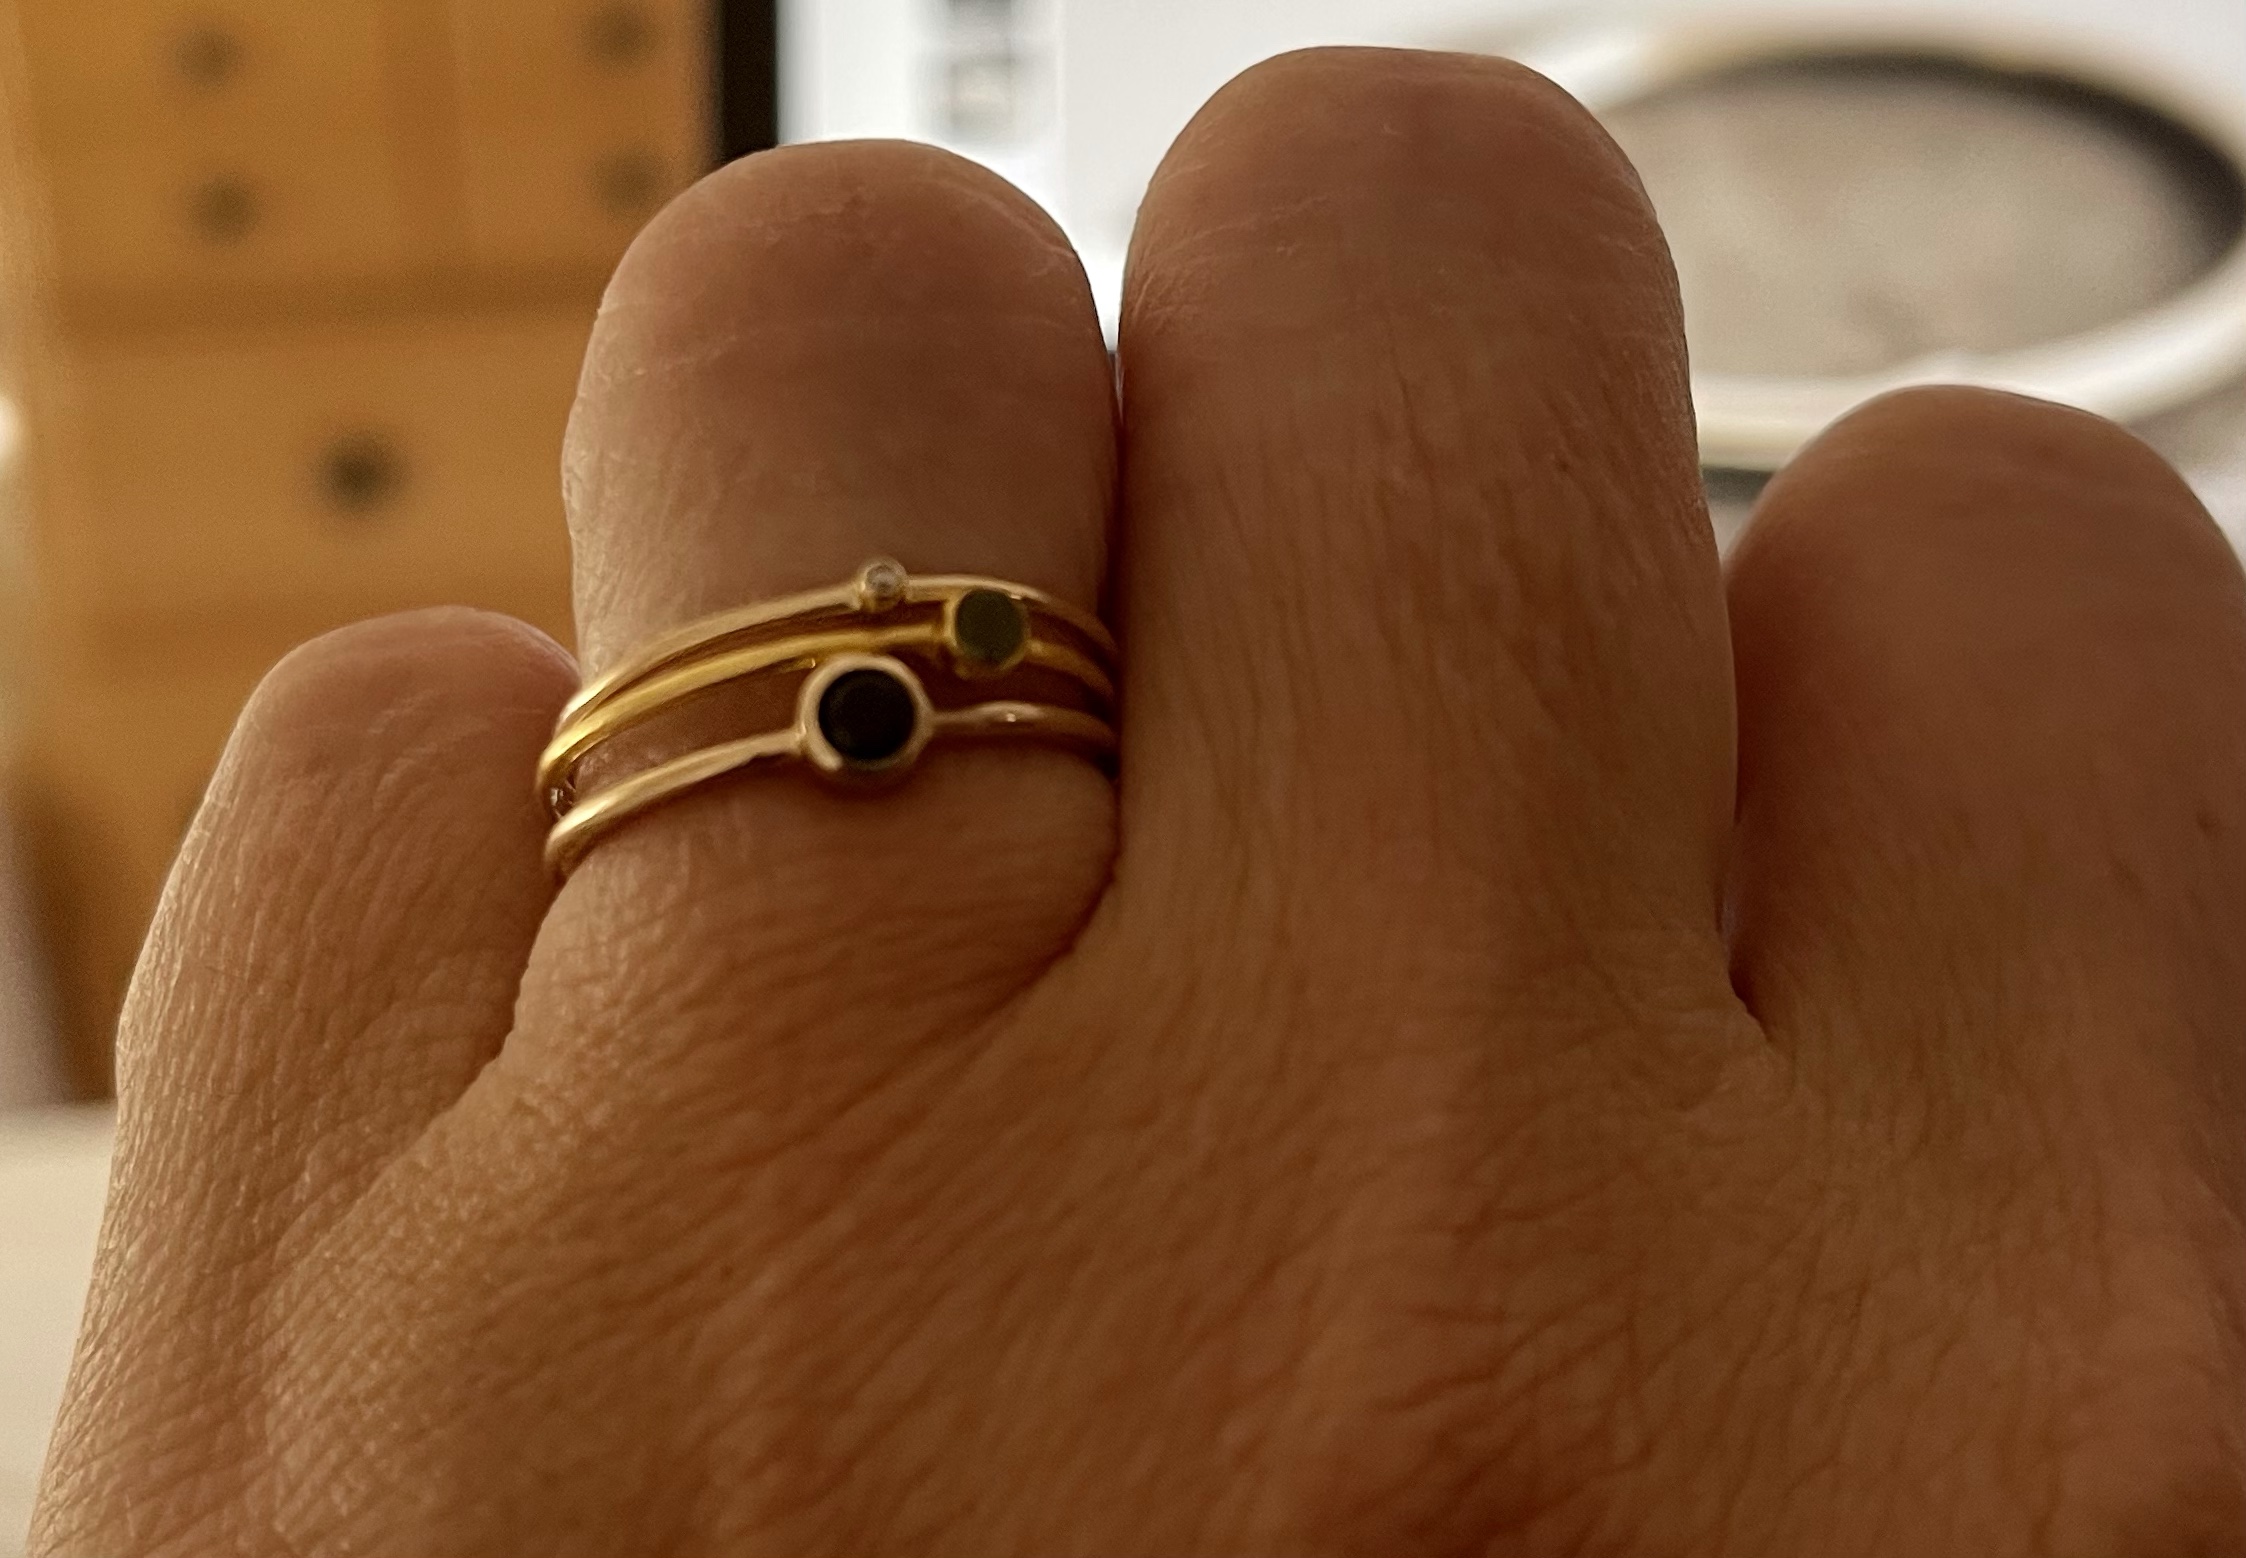
What a surprise to open my package to find this itty bitty diamond ring which I purchased to go with my stackable birthstone rings! My 6-year old daughter was so upset and wanted to know why her birthstone ring was smaller than the other two. I didn’t have an answer other than, I was taken in by what sounded too good to be true. Lesson learned.

Princess Unicorn Royal Tea Party
Celebrate every little princess
Our family loves celebrating birthdays. Ever since our little guys were born, we made an effort to make each birthday special by choosing a fun theme and creating a unique cake and decorations to go with it. One year our son was all about tanks, so we turned our dining room into a mess hall and our tractor into a tank!
We look forward getting friends and family together every year to celebrate our little ones milestone trips around the sun, however last year the princess party my daughter and I spent months talking about and weeks planning fell completely apart (along with millions of other’s celebration plans) when it became apparent that her 5th birthday that fell on April 16th would have to be cancelled due to COVID. Graciously, despite the disappointment – she compromised on a homemade confetti unicorn cake that was way too big for our family of four to eat on our own, but did our best!
This year to compensate for last years disappointment, we may have gone a wee bit overboard … ok, a lot overboard, but as we started planning – we wanted a party where we could celebrate no only our daughter, but her friends who also missed out last year. What more, we wanted to honor the mothers as well – after all we did survive remote learning (just barely).
Given that our little girls are just that, little girls, for only a short season – I played off our daughter’s request to have a Unicorn Princess Tea Party and thought what it would be like to bring one of her princesses storybooks to life and pulled inspiration from there and of course Pinterest! The following is what resulted … hope you enjoy! 🙂
Hear Ye, Hear Ye!
Lady Emma-Anne has requested a gathering of the other princesses of the land for a Royal Tea Party.
Ladys should arrive in pink tops (if possible) and will be provided princess attire and jeweled adornments.
Entertaining games will follow before receiving an etiquette lesson in how to be a princess prior to attending a royal tea complete with scrumptious finger sandwiches and an array of yummy desserts.
Queen Mums are also welcome to join their princesses as we socialize over brunch and adult beverages suitable for a queen.
Cordially,
The Queen Mum
Welcome all Queen Mum’s and Princesses!


I found the 16×20 welcome sign at BlueBunnyPrintables on Etsy. They were so easy to work with and had my order done within 24-HRS. All I had to do was download the image.
Once I had the poster image I uploaded it to the Wal-Mart Photo Center and had the 16×20 poster printed at our local Wal-Mart for under $7. I was really impressed with the high quality image and paper they used. While I was there I picked up an inexpensive frame for just $15.
I used our son & daughter’s craft easel to prop the frame up.
I ordered a HUGE role of white netting and pink ribbon from Amazon.com and carried the ribbon and netting decoration theme into the house and through the rooms. Very simple, girlie and effective!
I picked up the two cypress topiaries and pots from our local area nursery (which will be going into larger pots later this spring to adorn our front door).
What’s Your Unicorn Name
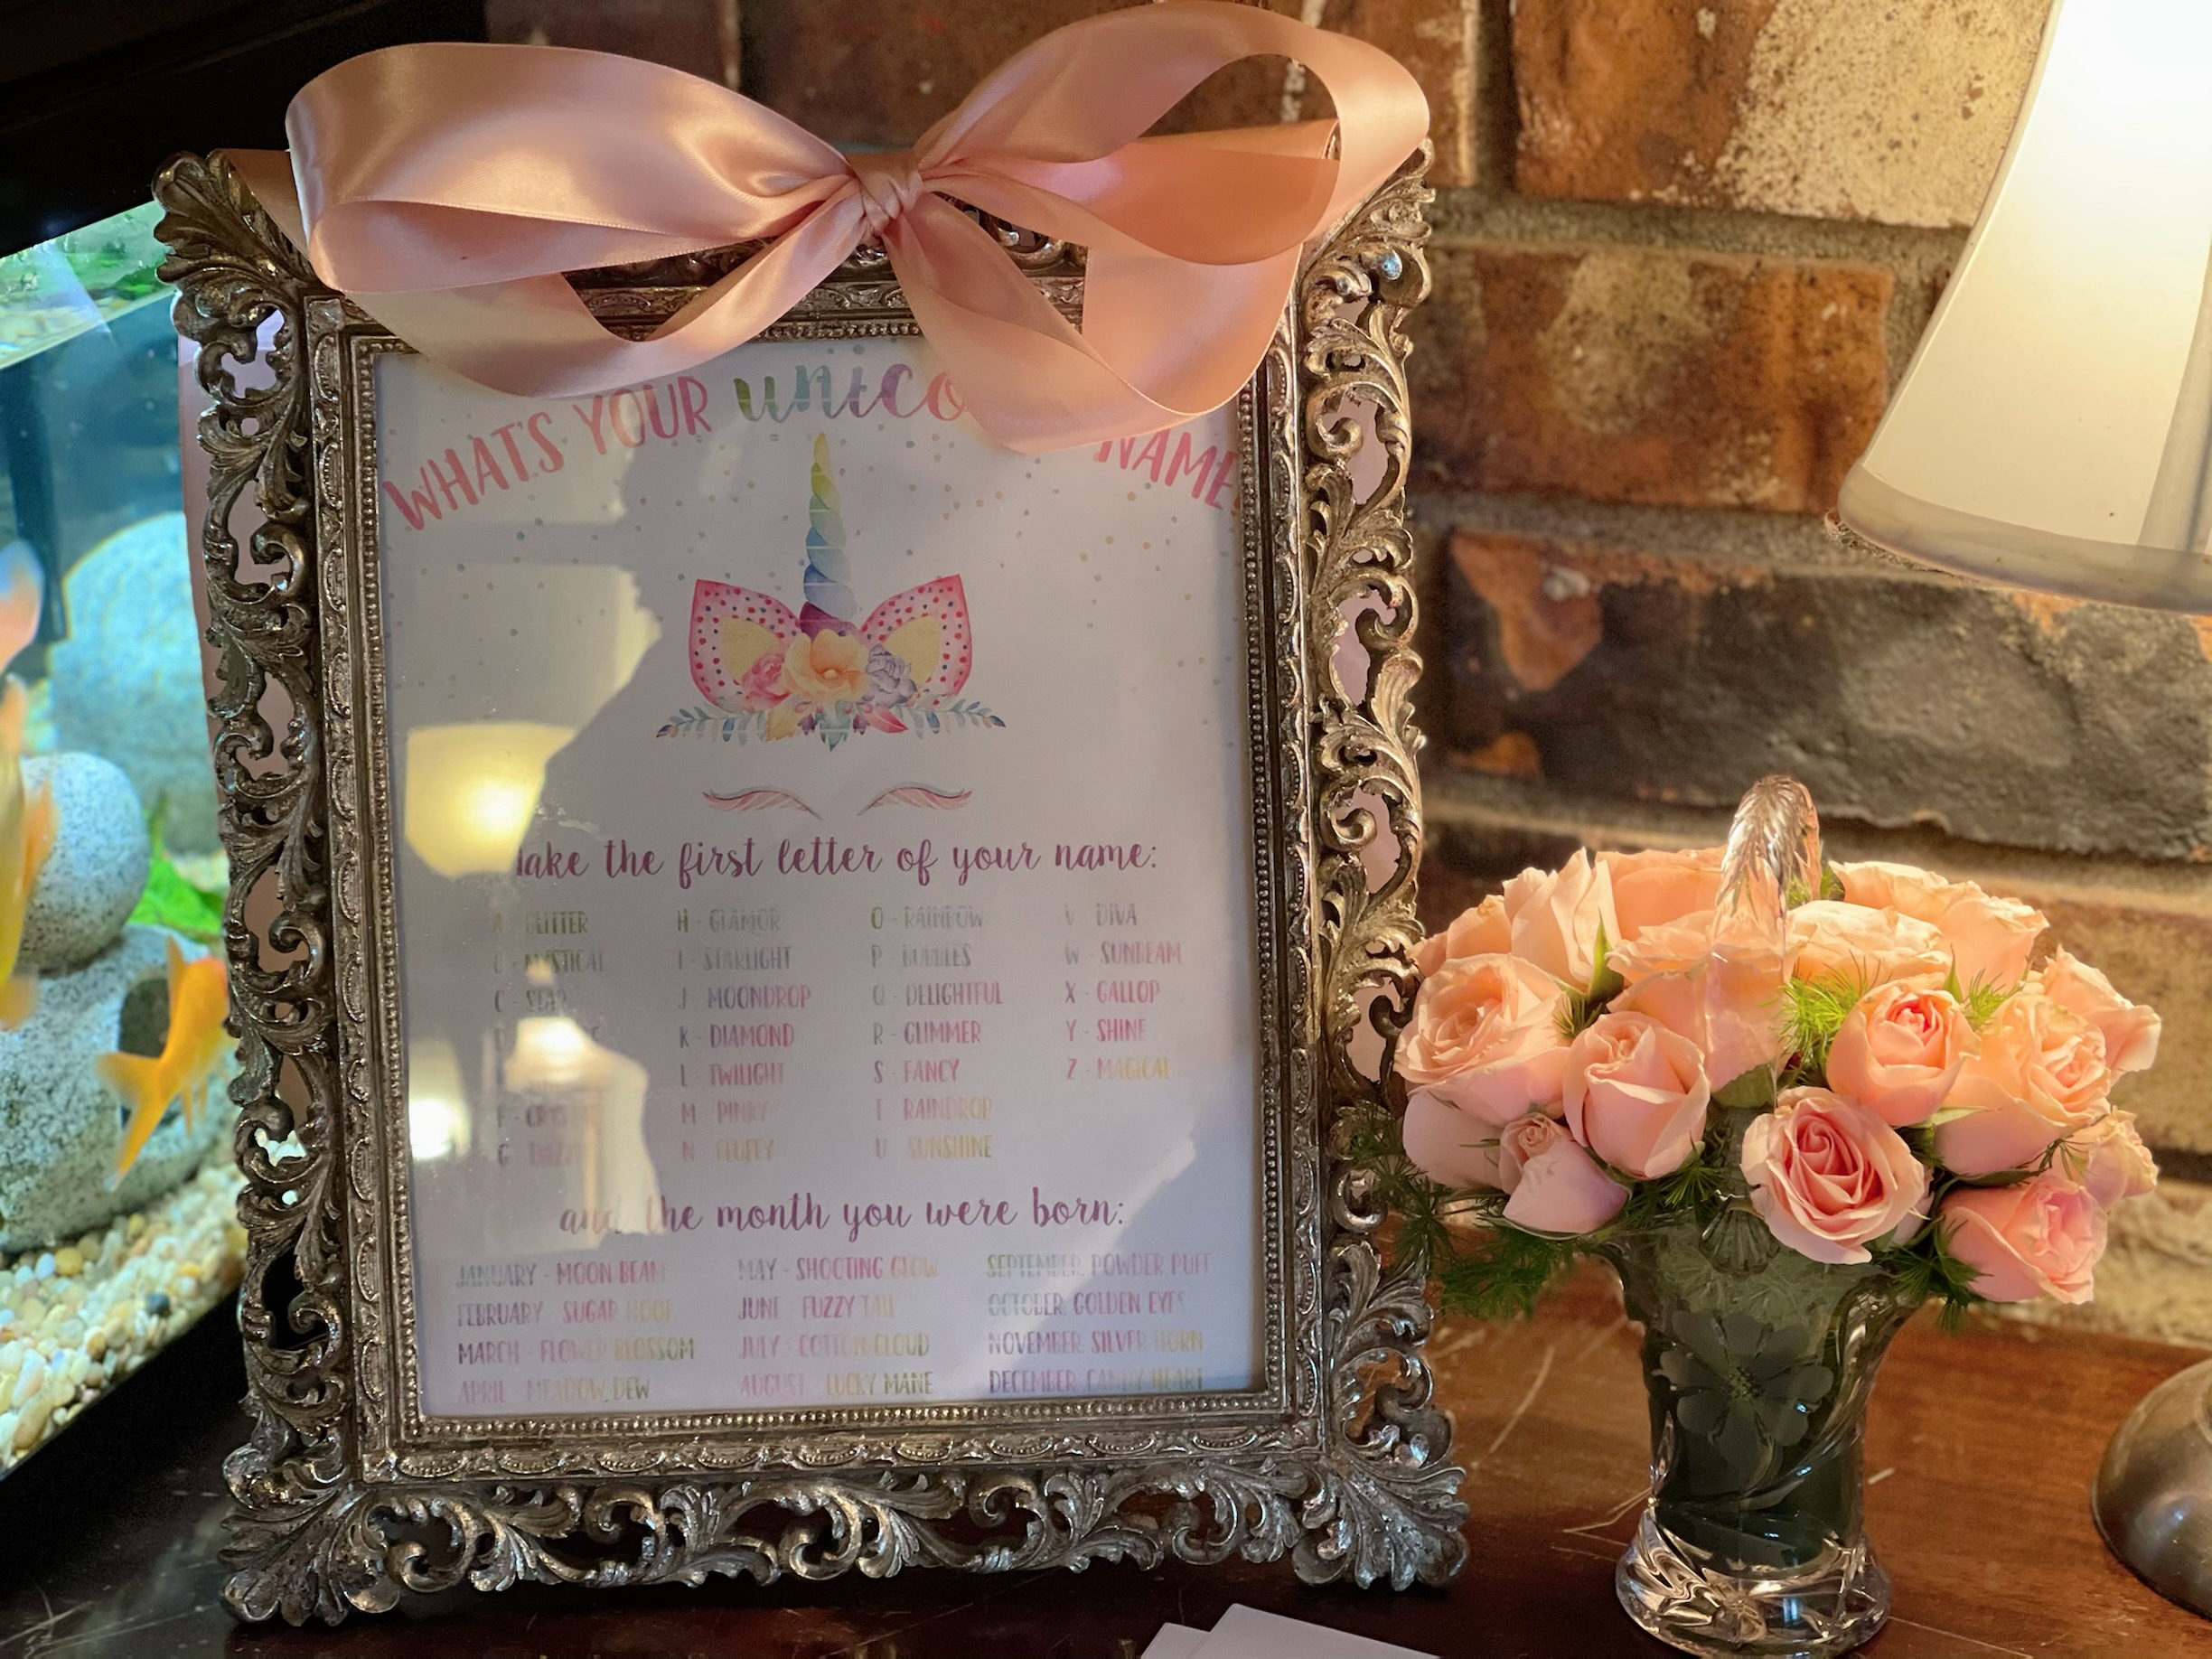
Once our guests entered the house, they received a name tag with their Unicorn name. This was a HUGE hit with not only the girls but the moms as well. Some even have saved the other mother’s unicorn names in their phone as their name ID. LOL!
Again I went to Etsy and found this fun welcoming ice breaker at BrownCowCreatives for just $5. What more they also preset the name tags so all you have to do is print them off on standard name tag stickers. This couldn’t have been any easier! We used a 8×10 frame we had at home to add a touch of elegance to the reception table with some flowers we placed in a glass basket my daughter and I picked up at a charity shop.
Moms & Mimosas
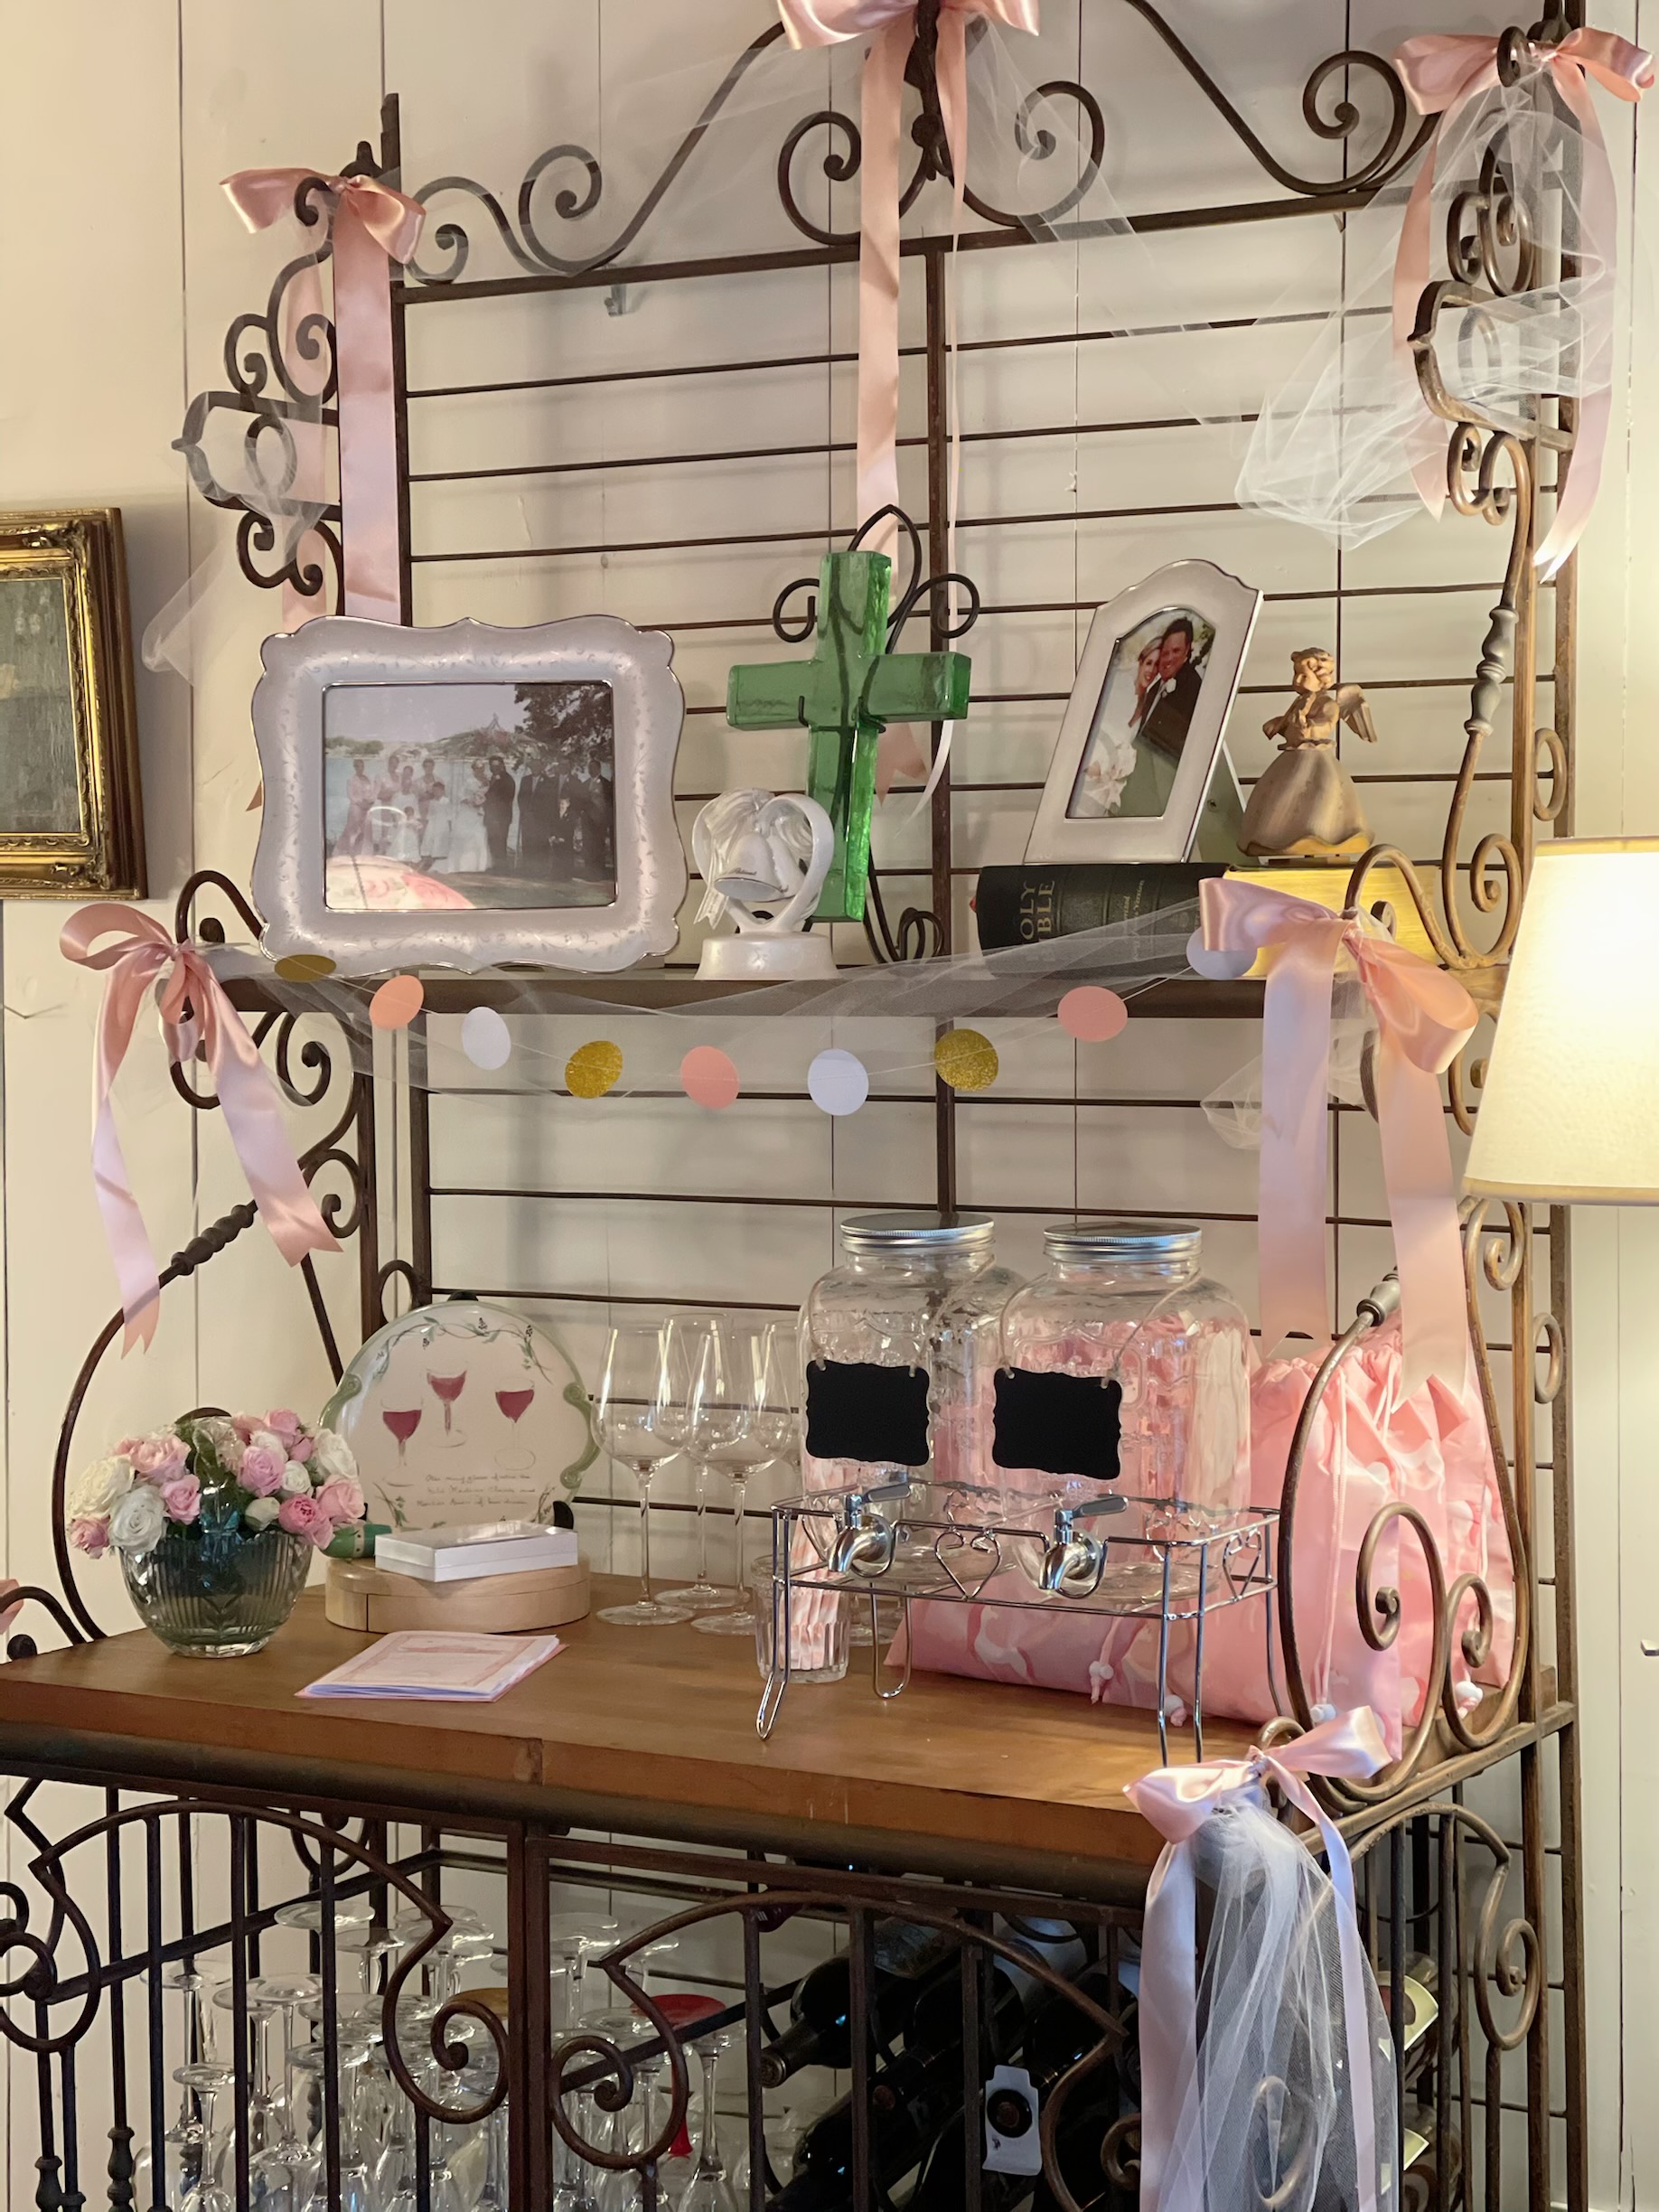
Once our guests received their name tags, the Queen Mums were treated to mimosas with fresh raspberries and each picked out their own rhinestone tiara to wear.
Princess Registry Table
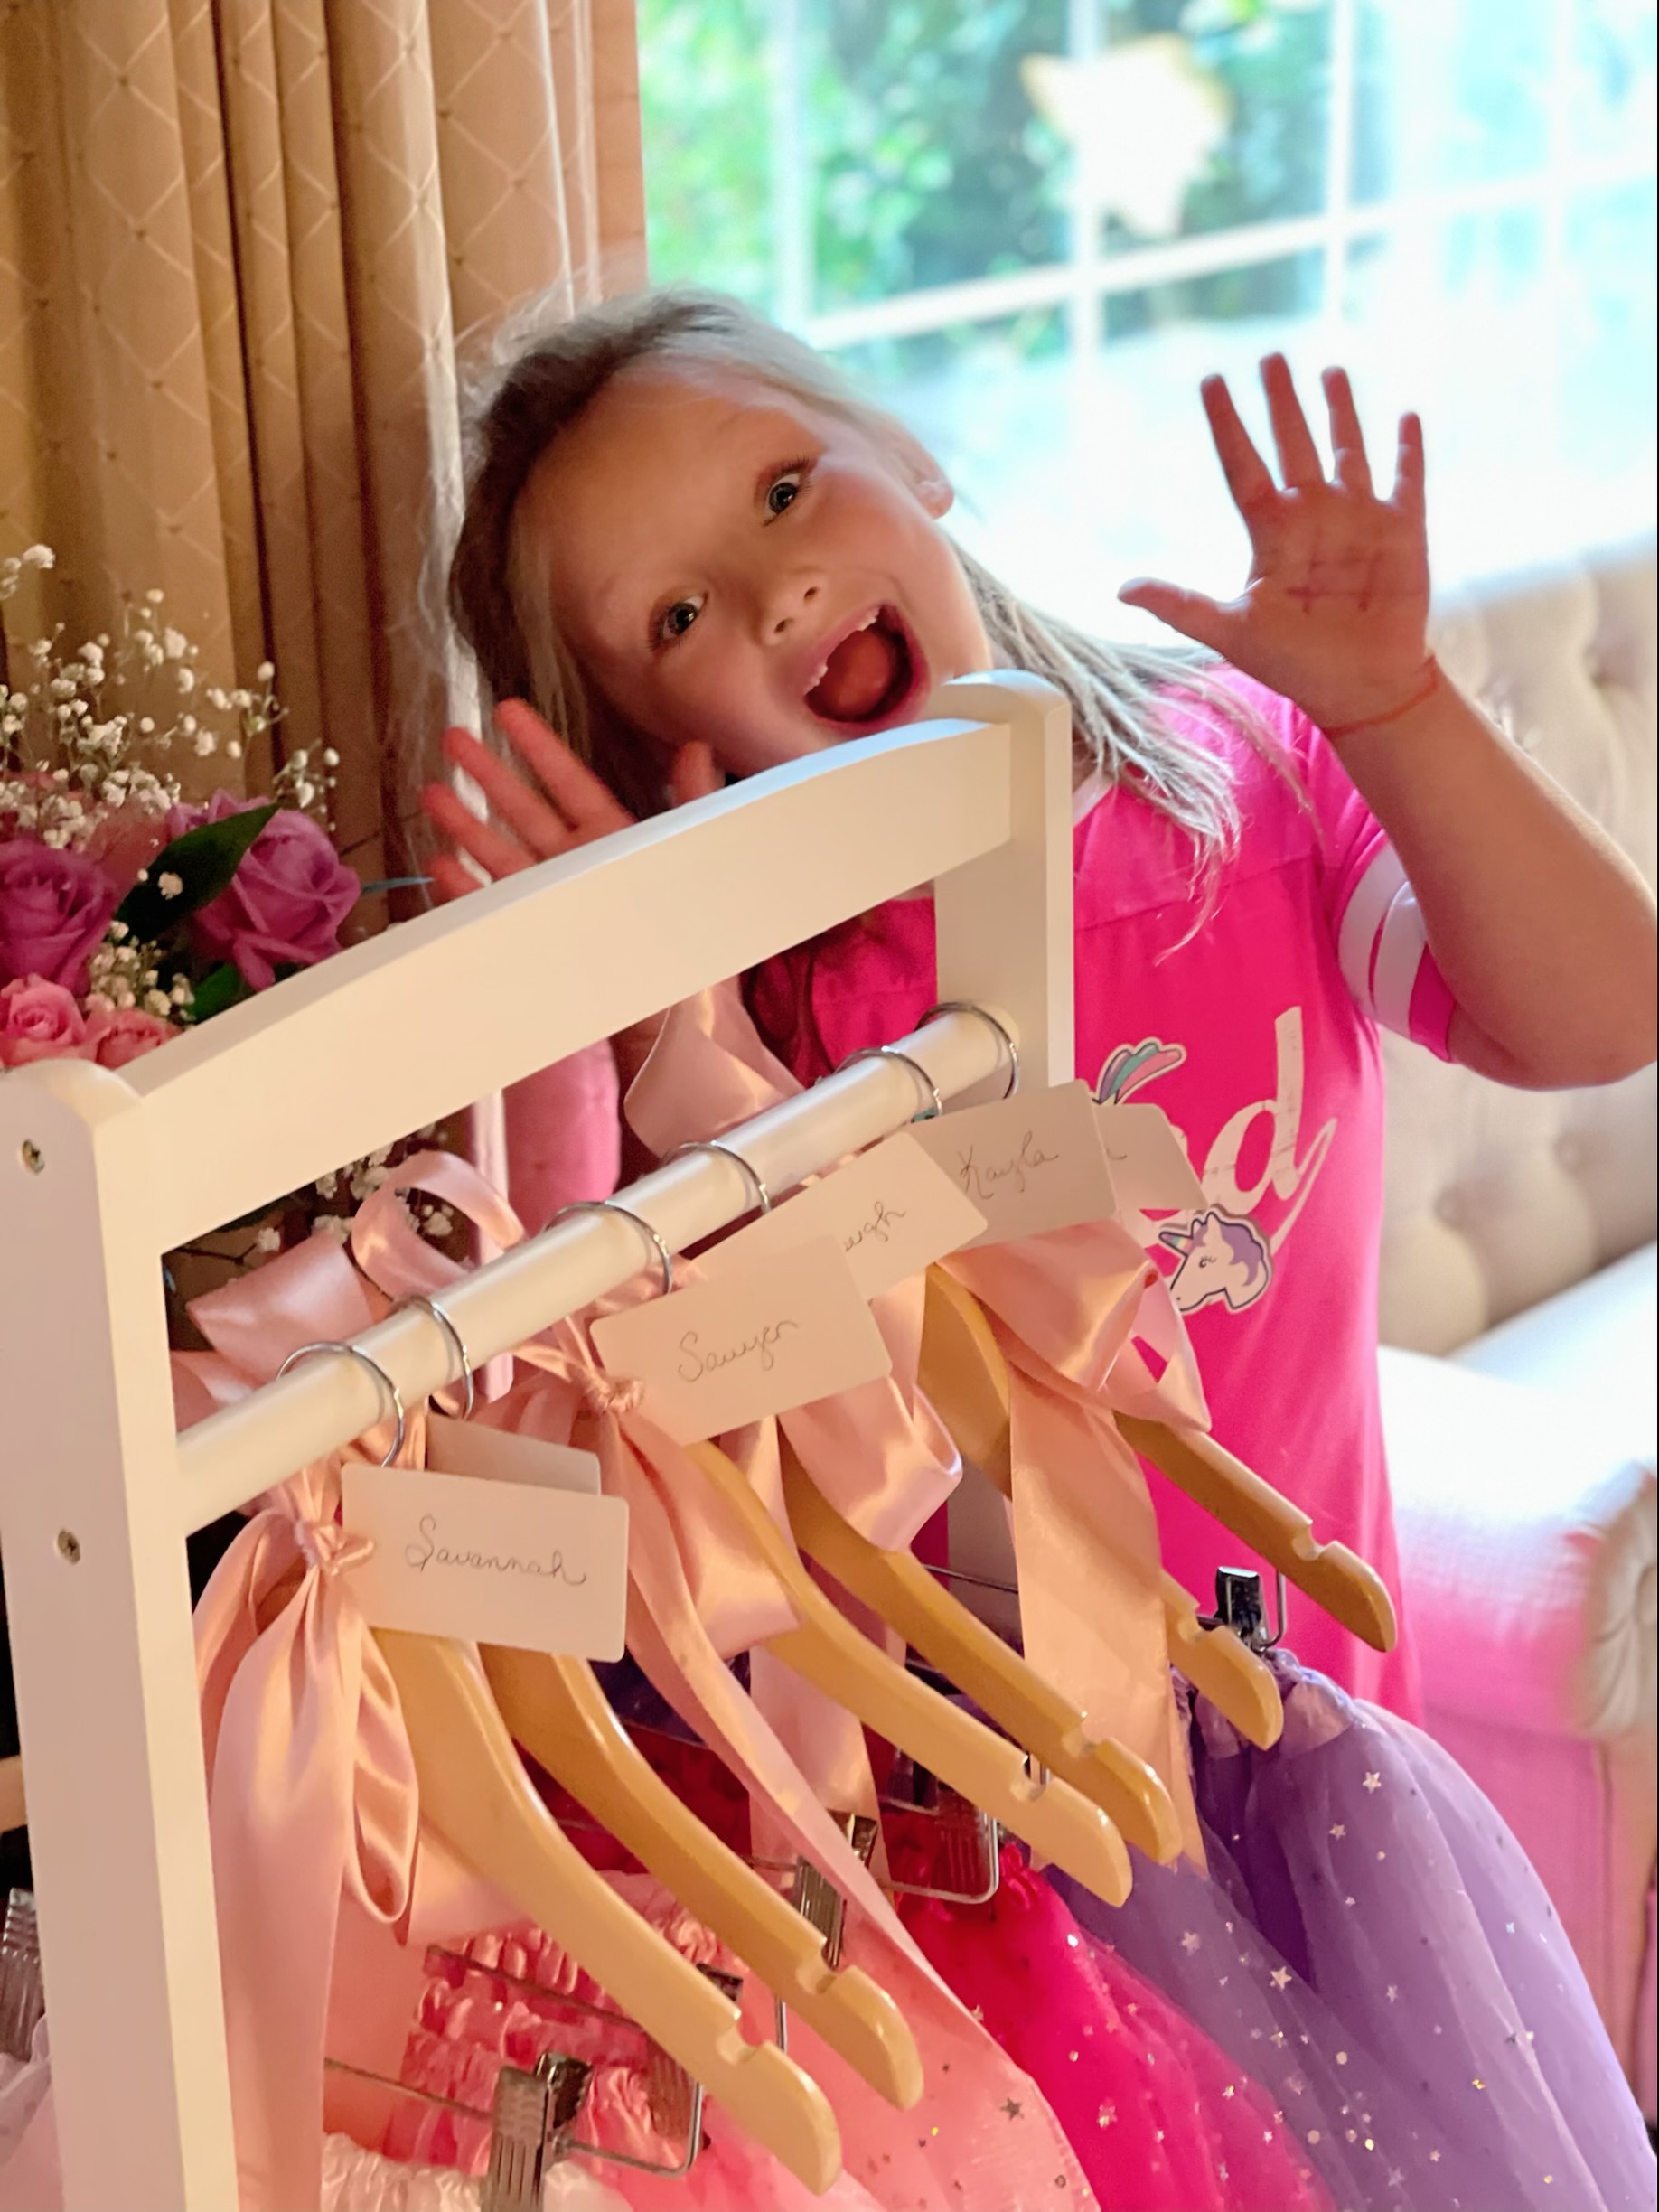
What girl doesn’t love to dress up in sparkly fluffy tutus?! Each princess received their own tutu to wear and keep.


This was by far the most popular table! Imagine have a your choice of shiny glittery bracelets and necklaces to try on and keep! Each princess personally chose her own jewelry before spraying themselves with rose water from the vintage atomizer perfume bottle that was filled with rose water. Each little princess must have visited this table half a dozen times during the party to freshen up and reapply rose water! A total hit!
Every princess needs a Fairy Godmother!
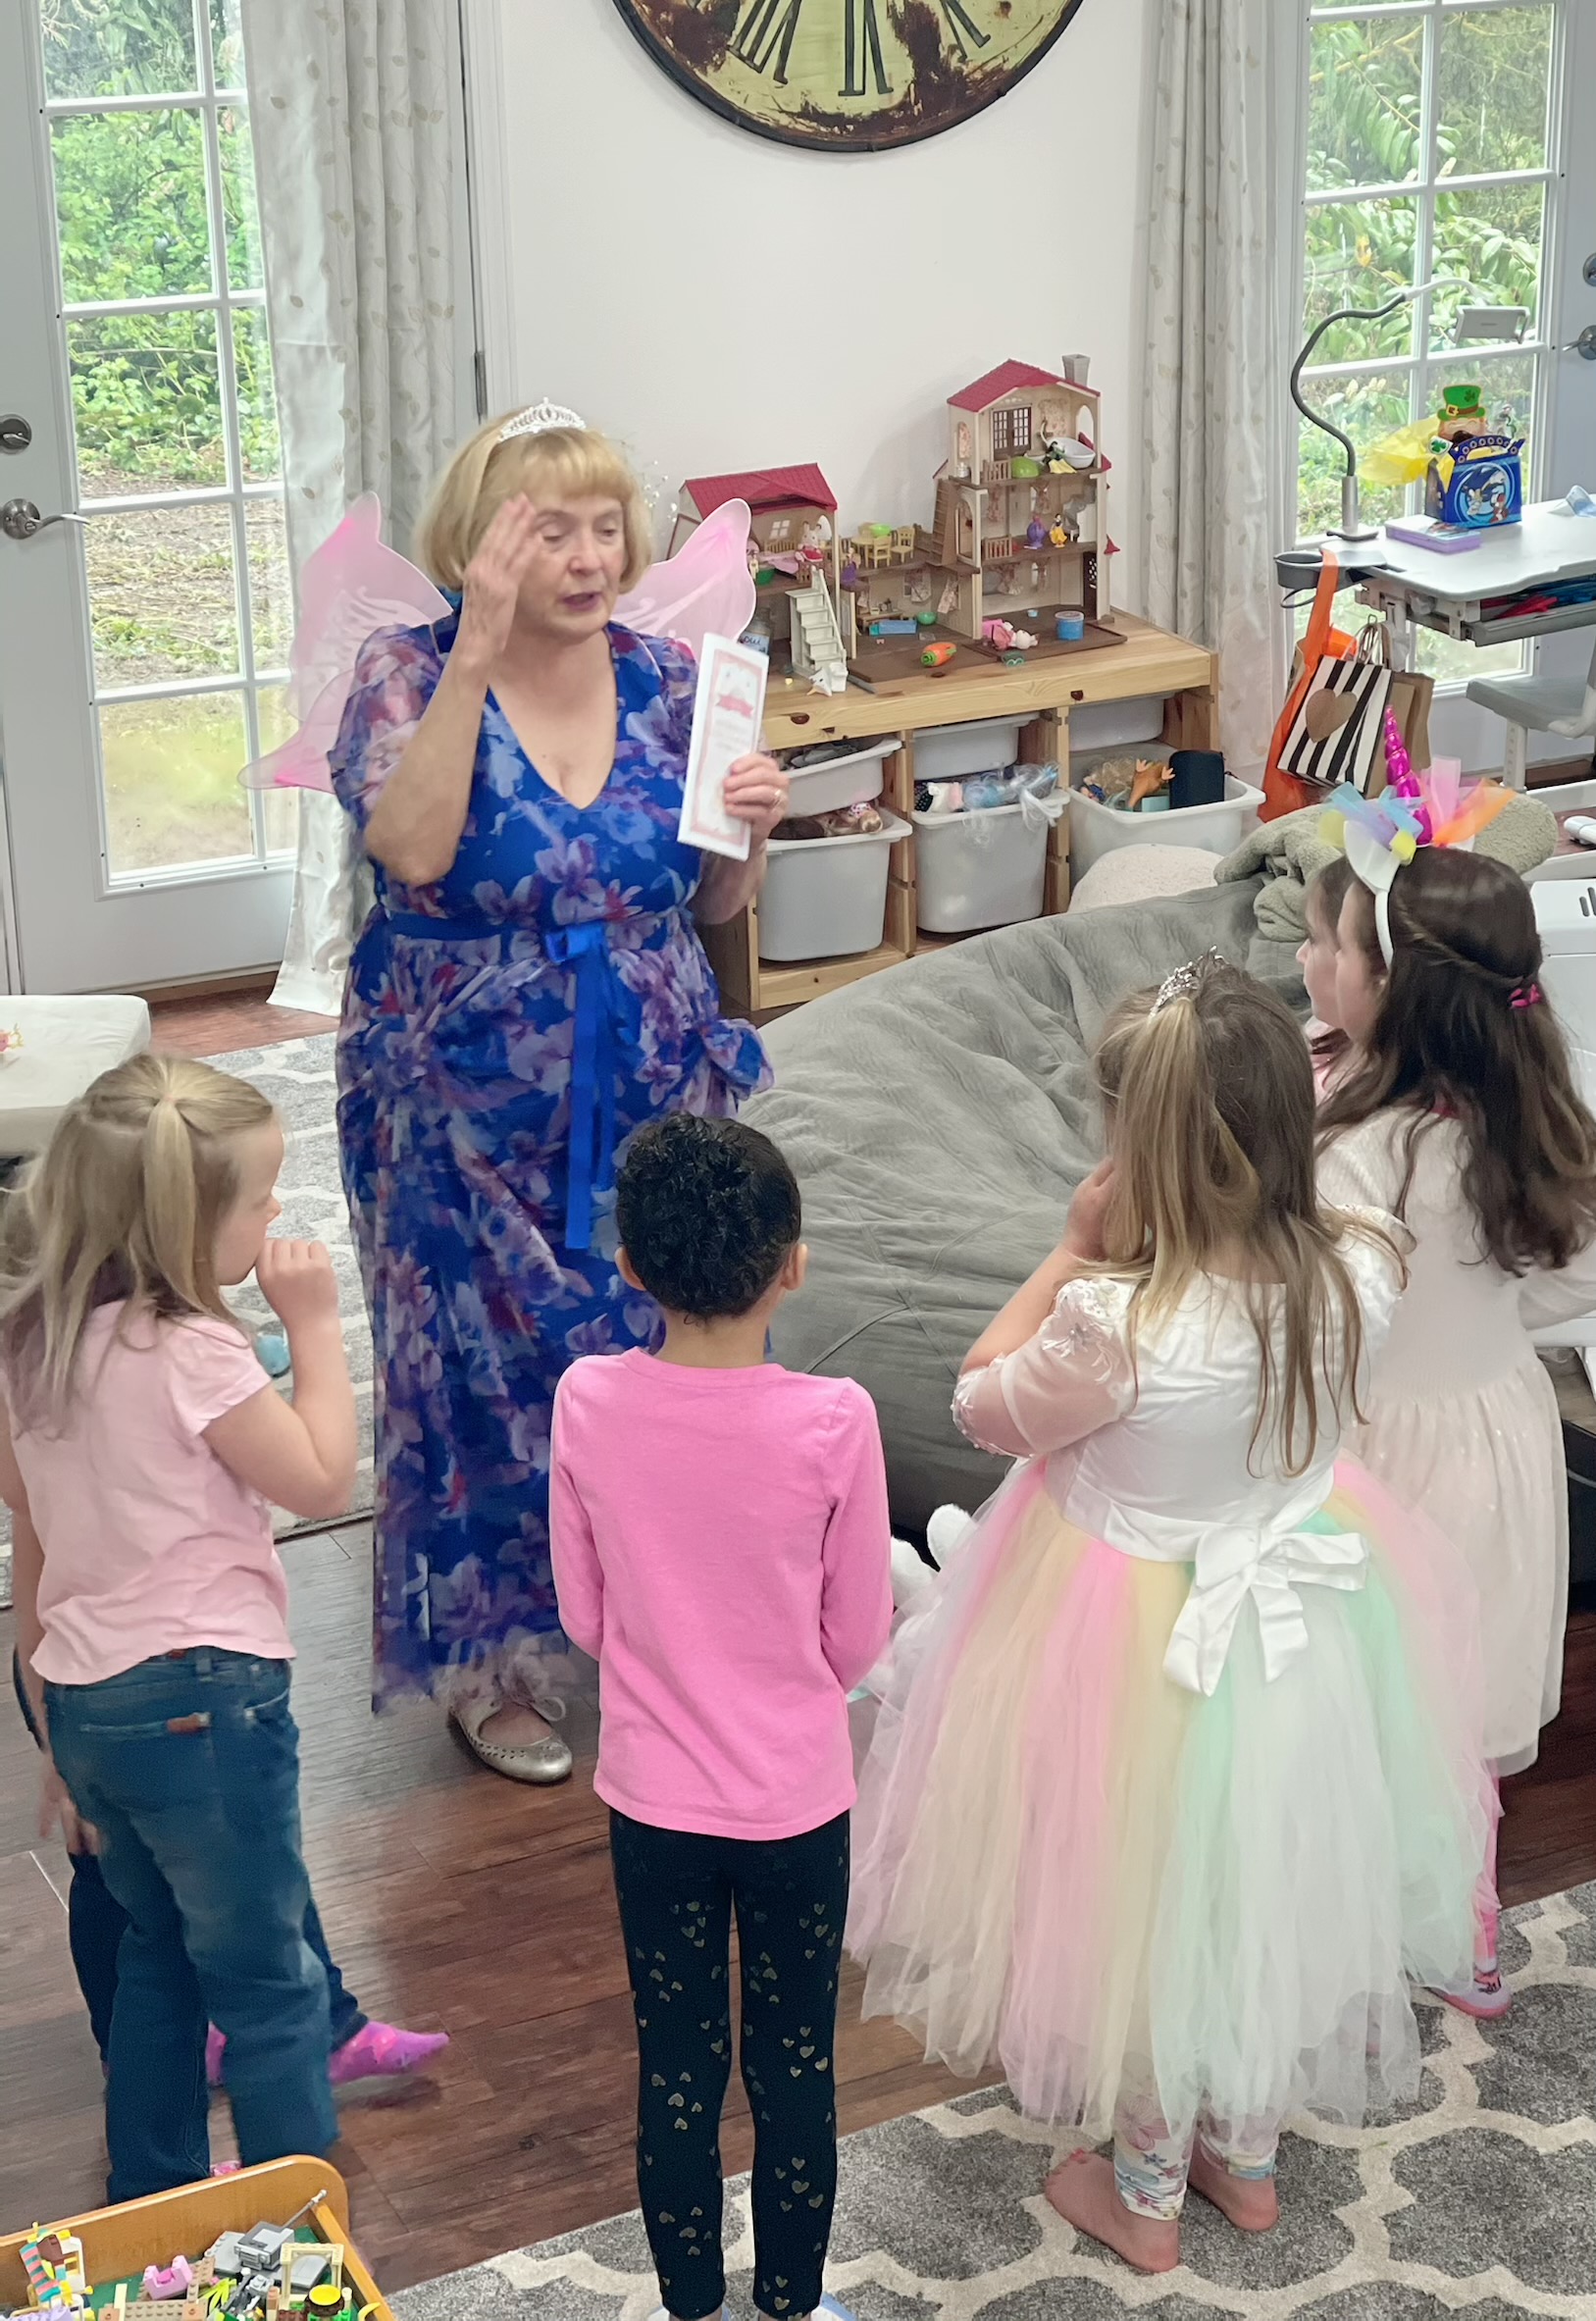
My Mother-In-Law was such a trooper! Not only did she embrace the role as a Fairy Godmother she had each little girl hypnotized and convinced she was real! With her pink fairy wings and heart wand she taught each little princess from her ‘Official Fairy Godmother Etiquette Book’ how to walk, wave, sit, and curtsy like a princess.
She also went over table manners and tea etiquette. How to place your napkin in your lap. Not talk with your mouth full. How to ask for something rather than grab what you want. Each little princess would later have an opportunity to practice what they learned at the Royal Tea.
Game time …
We had a lot of fun playing a couple of games. The first game we played was where a gift wrapped box was passed around from princess to princess. As it was passed around each princess had a chance to unwrap one of the boxes until they finally reached the last box inside which contained a box of rings for the girls to wear.
Next we played that was a take on ‘hide the thimble’ but this was ‘Find the glass slipper’. The girls had a lot of fun searching the room and working together to find the glass slipper. Each one of them wanted to hold and look at the plastic glass slipper.
Sweet Temptation

No birthday (or Royal Tea) is complete without sweets!

We were able to find a local bakery which was able to make unicorn cupcakes, cookies and macaroons. Our daughter was very clear about about the unicorn theme, so we incorporated the fondant and buttercream chocolate and vanilla cupcakes with teapot sugar cookies and fairy dusted strawberry and vanilla macaroons. We also ordered petit fours from Harry and David to add to the High Tea with strawberry yogurt covered pretzels.
We went through a floral wholesaler to bulk order a ton of flowers which my mother really enjoyed arranging in a variety of ways – such as in the cinderella carriage. We had a lot of fun with flower arrangements, which really made everyone feel special.

Needless to say our little princess was more than excited.
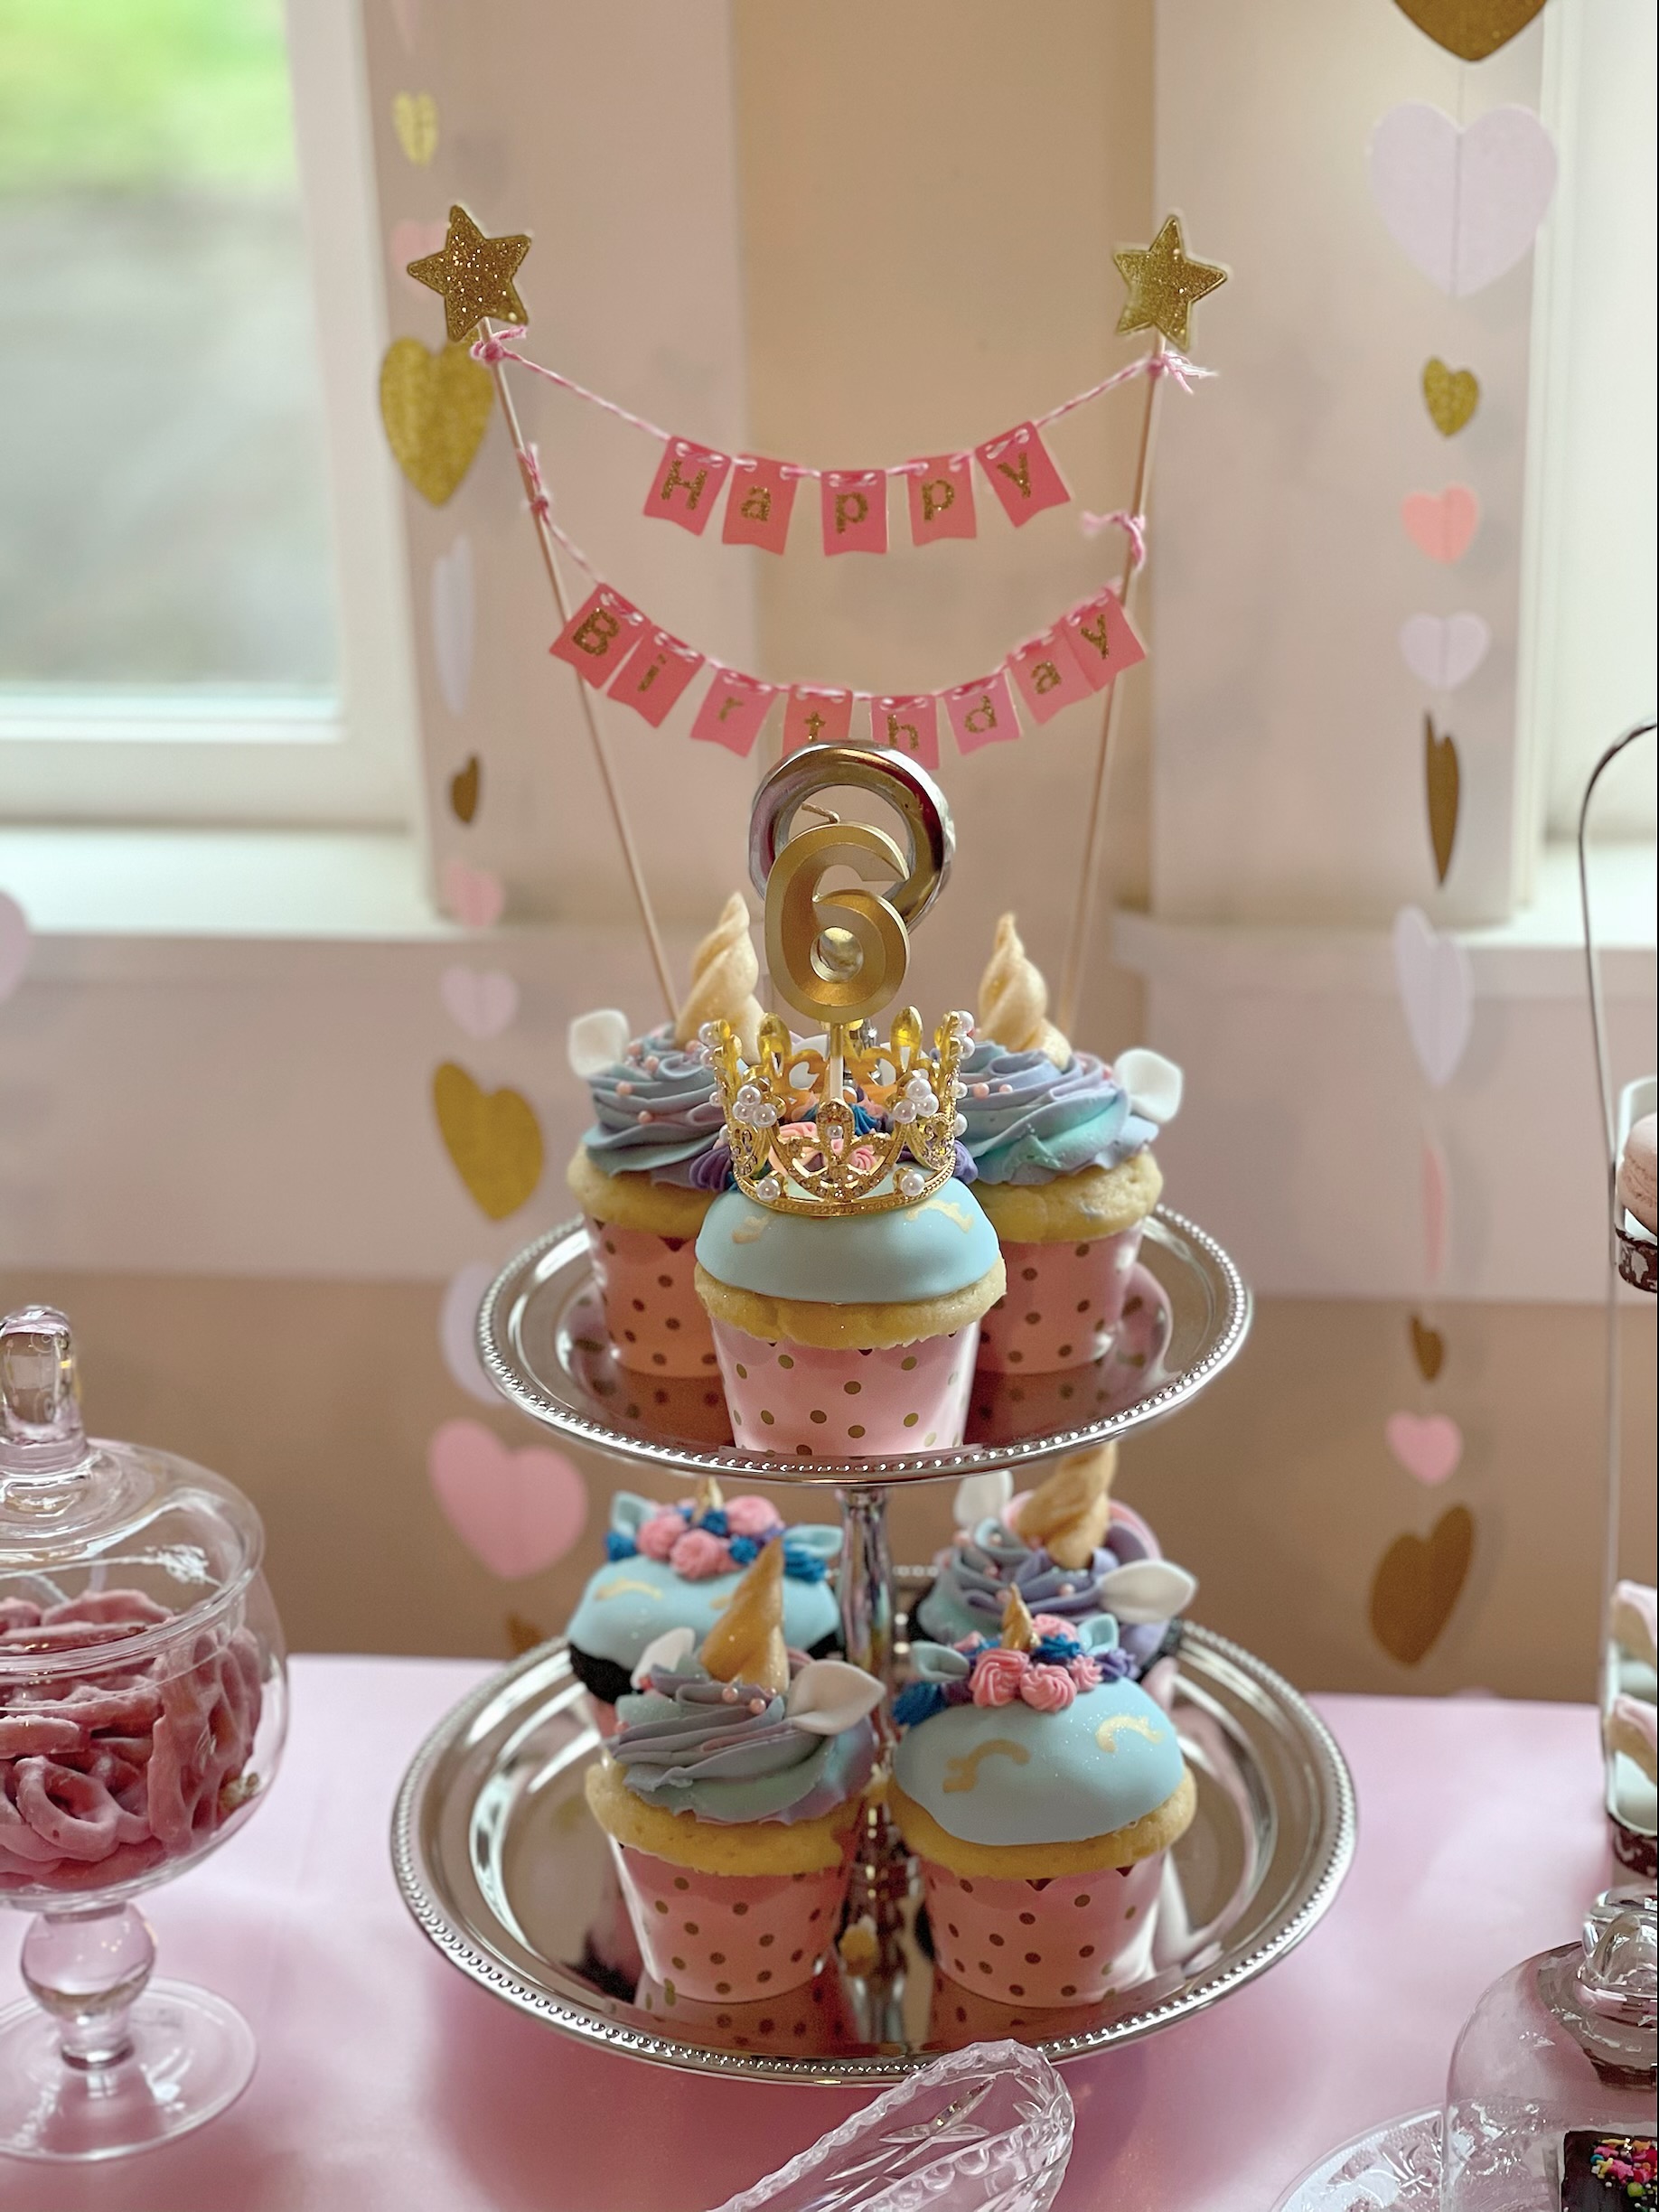
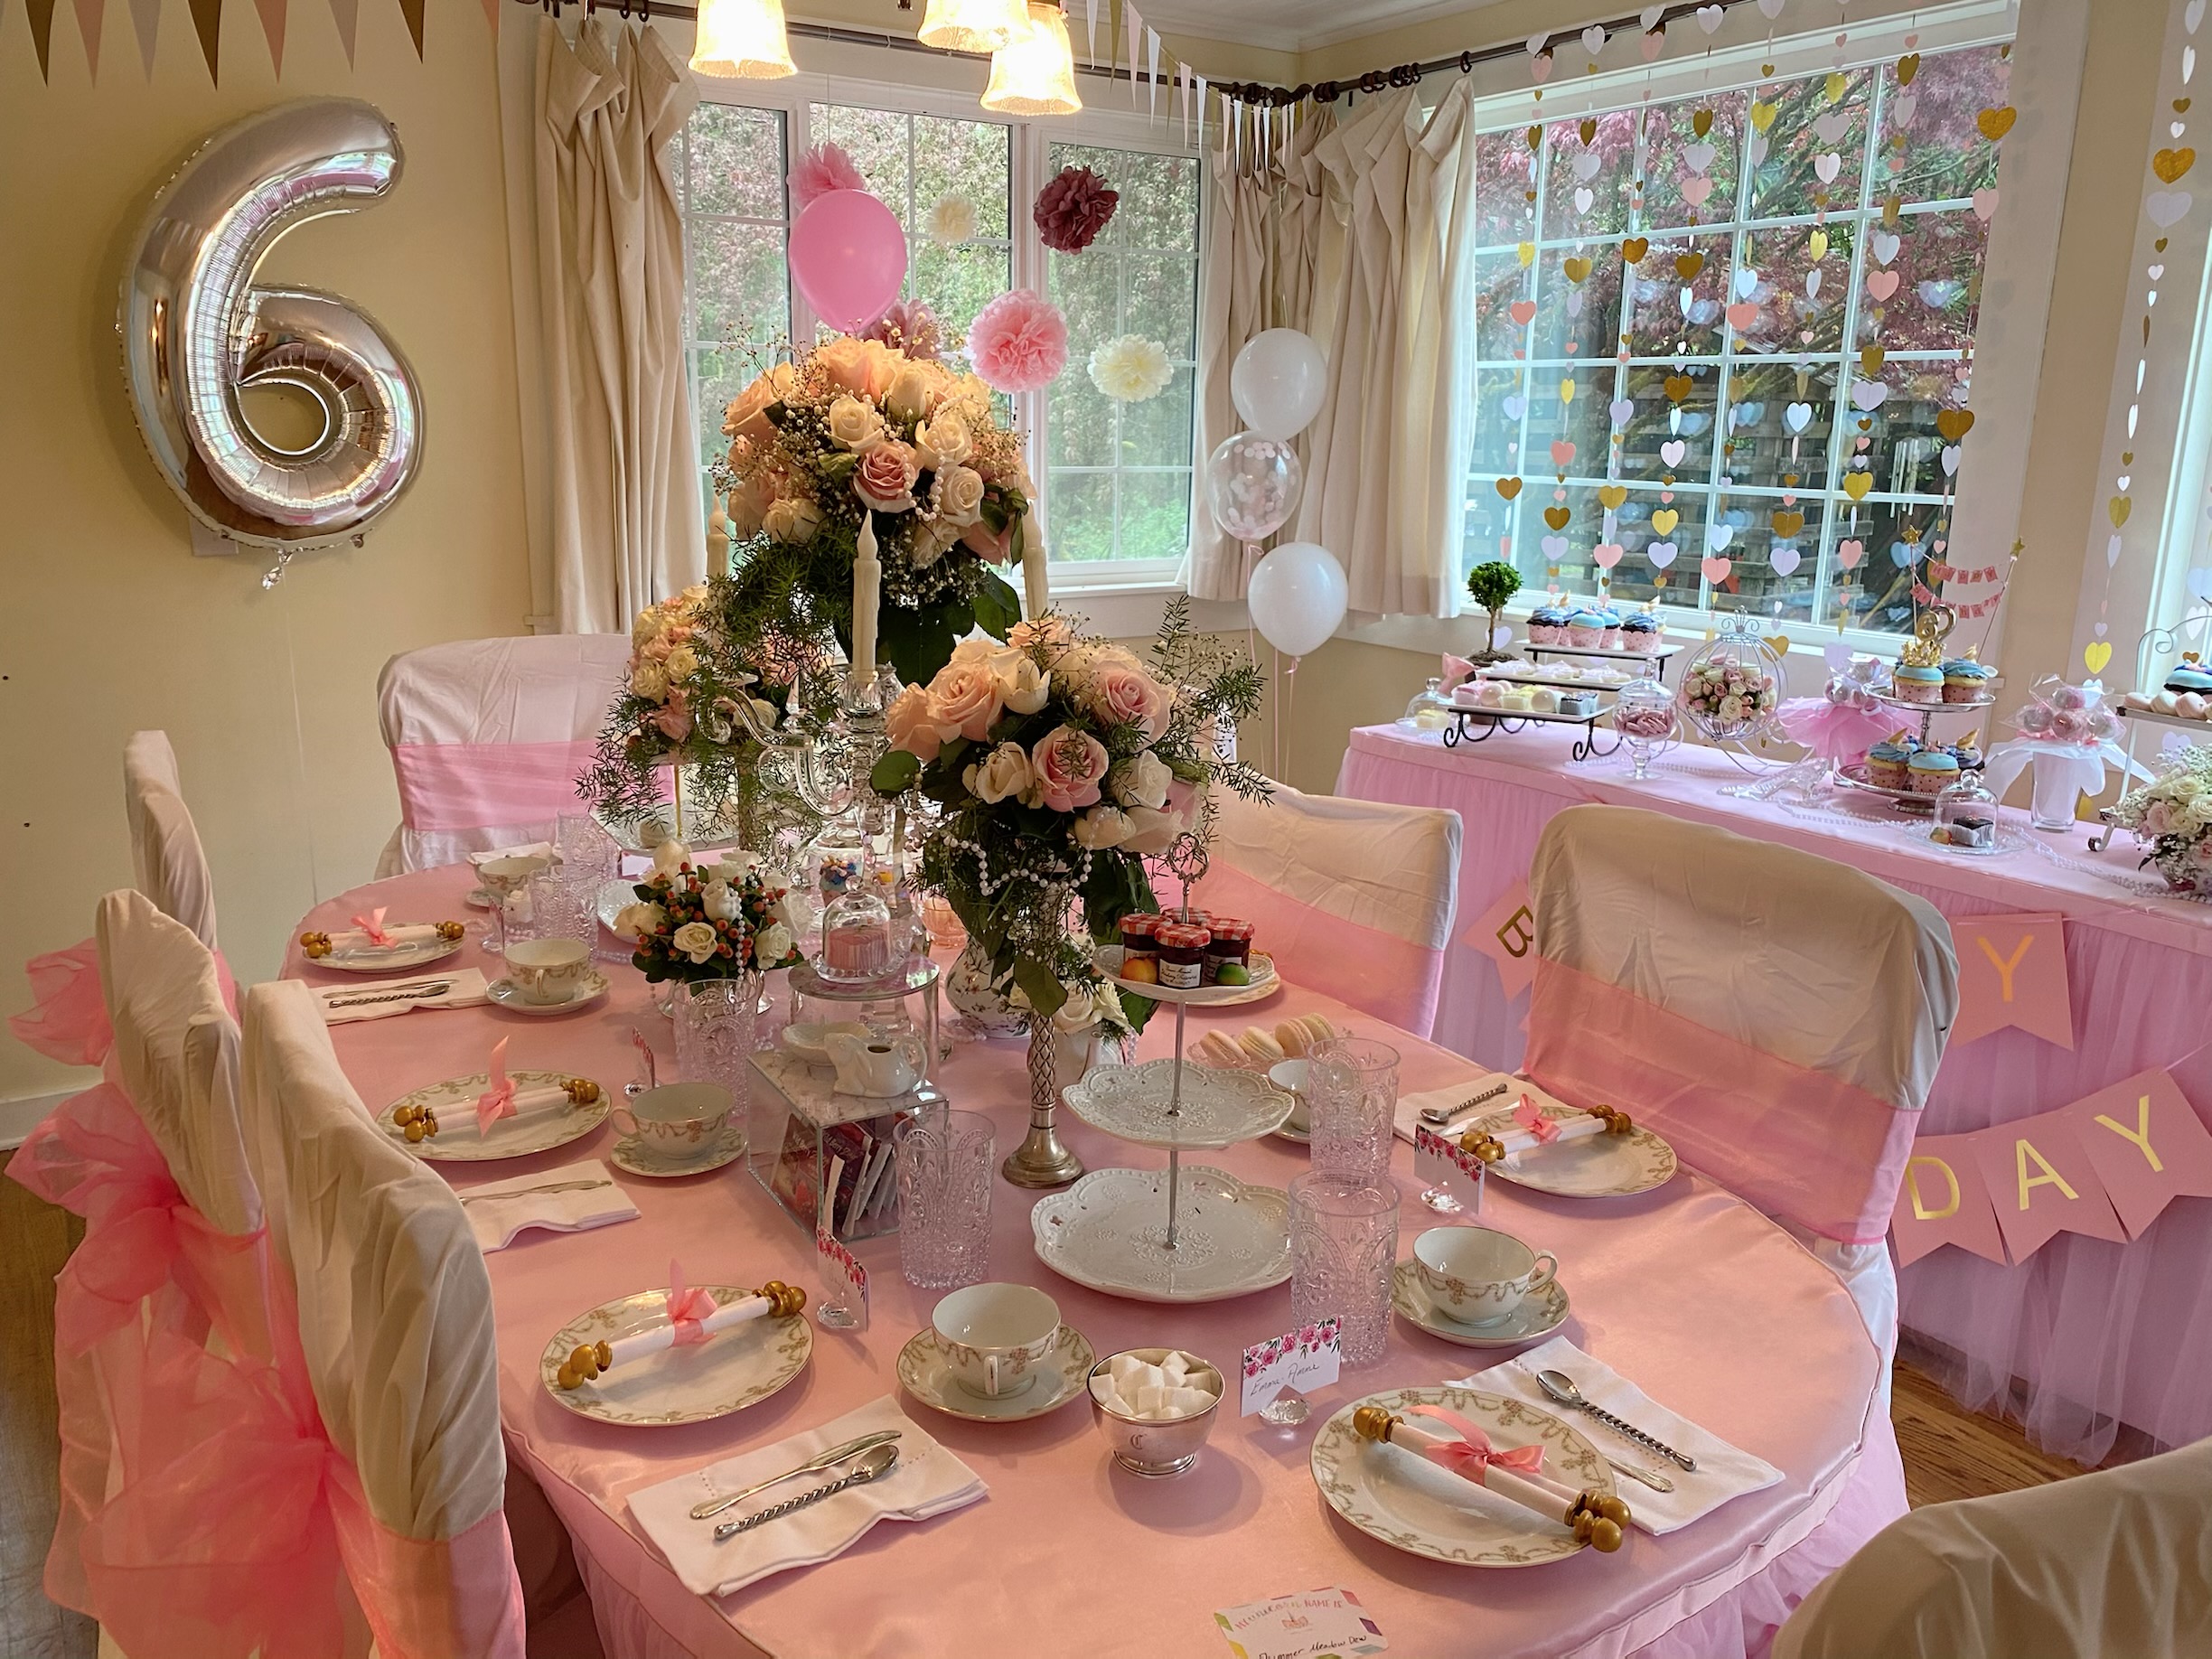
Rather than a huge cake, we kept things simple and arranged some of the cupcakes on a tiered plate and added a little birthday banner which added additional height to the display with a fun gold crown on the birthday girl’s cupcake, and number candle – all of which we found on Amazon.com. The girls loved the little gold crown and each took holding it.


Of course what’s a princess tea party without a cupcake ferris wheel?! This was such a fun and cute display piece which we are going to have fun using again and again in the future!

My daughter and I found a large set of these vintage press glass plates at one of the local charity shops. They worked perfectly with the royal tea theme, what more – they were perfect for the Queen Mums to use when we brought out the yummy savory treats!
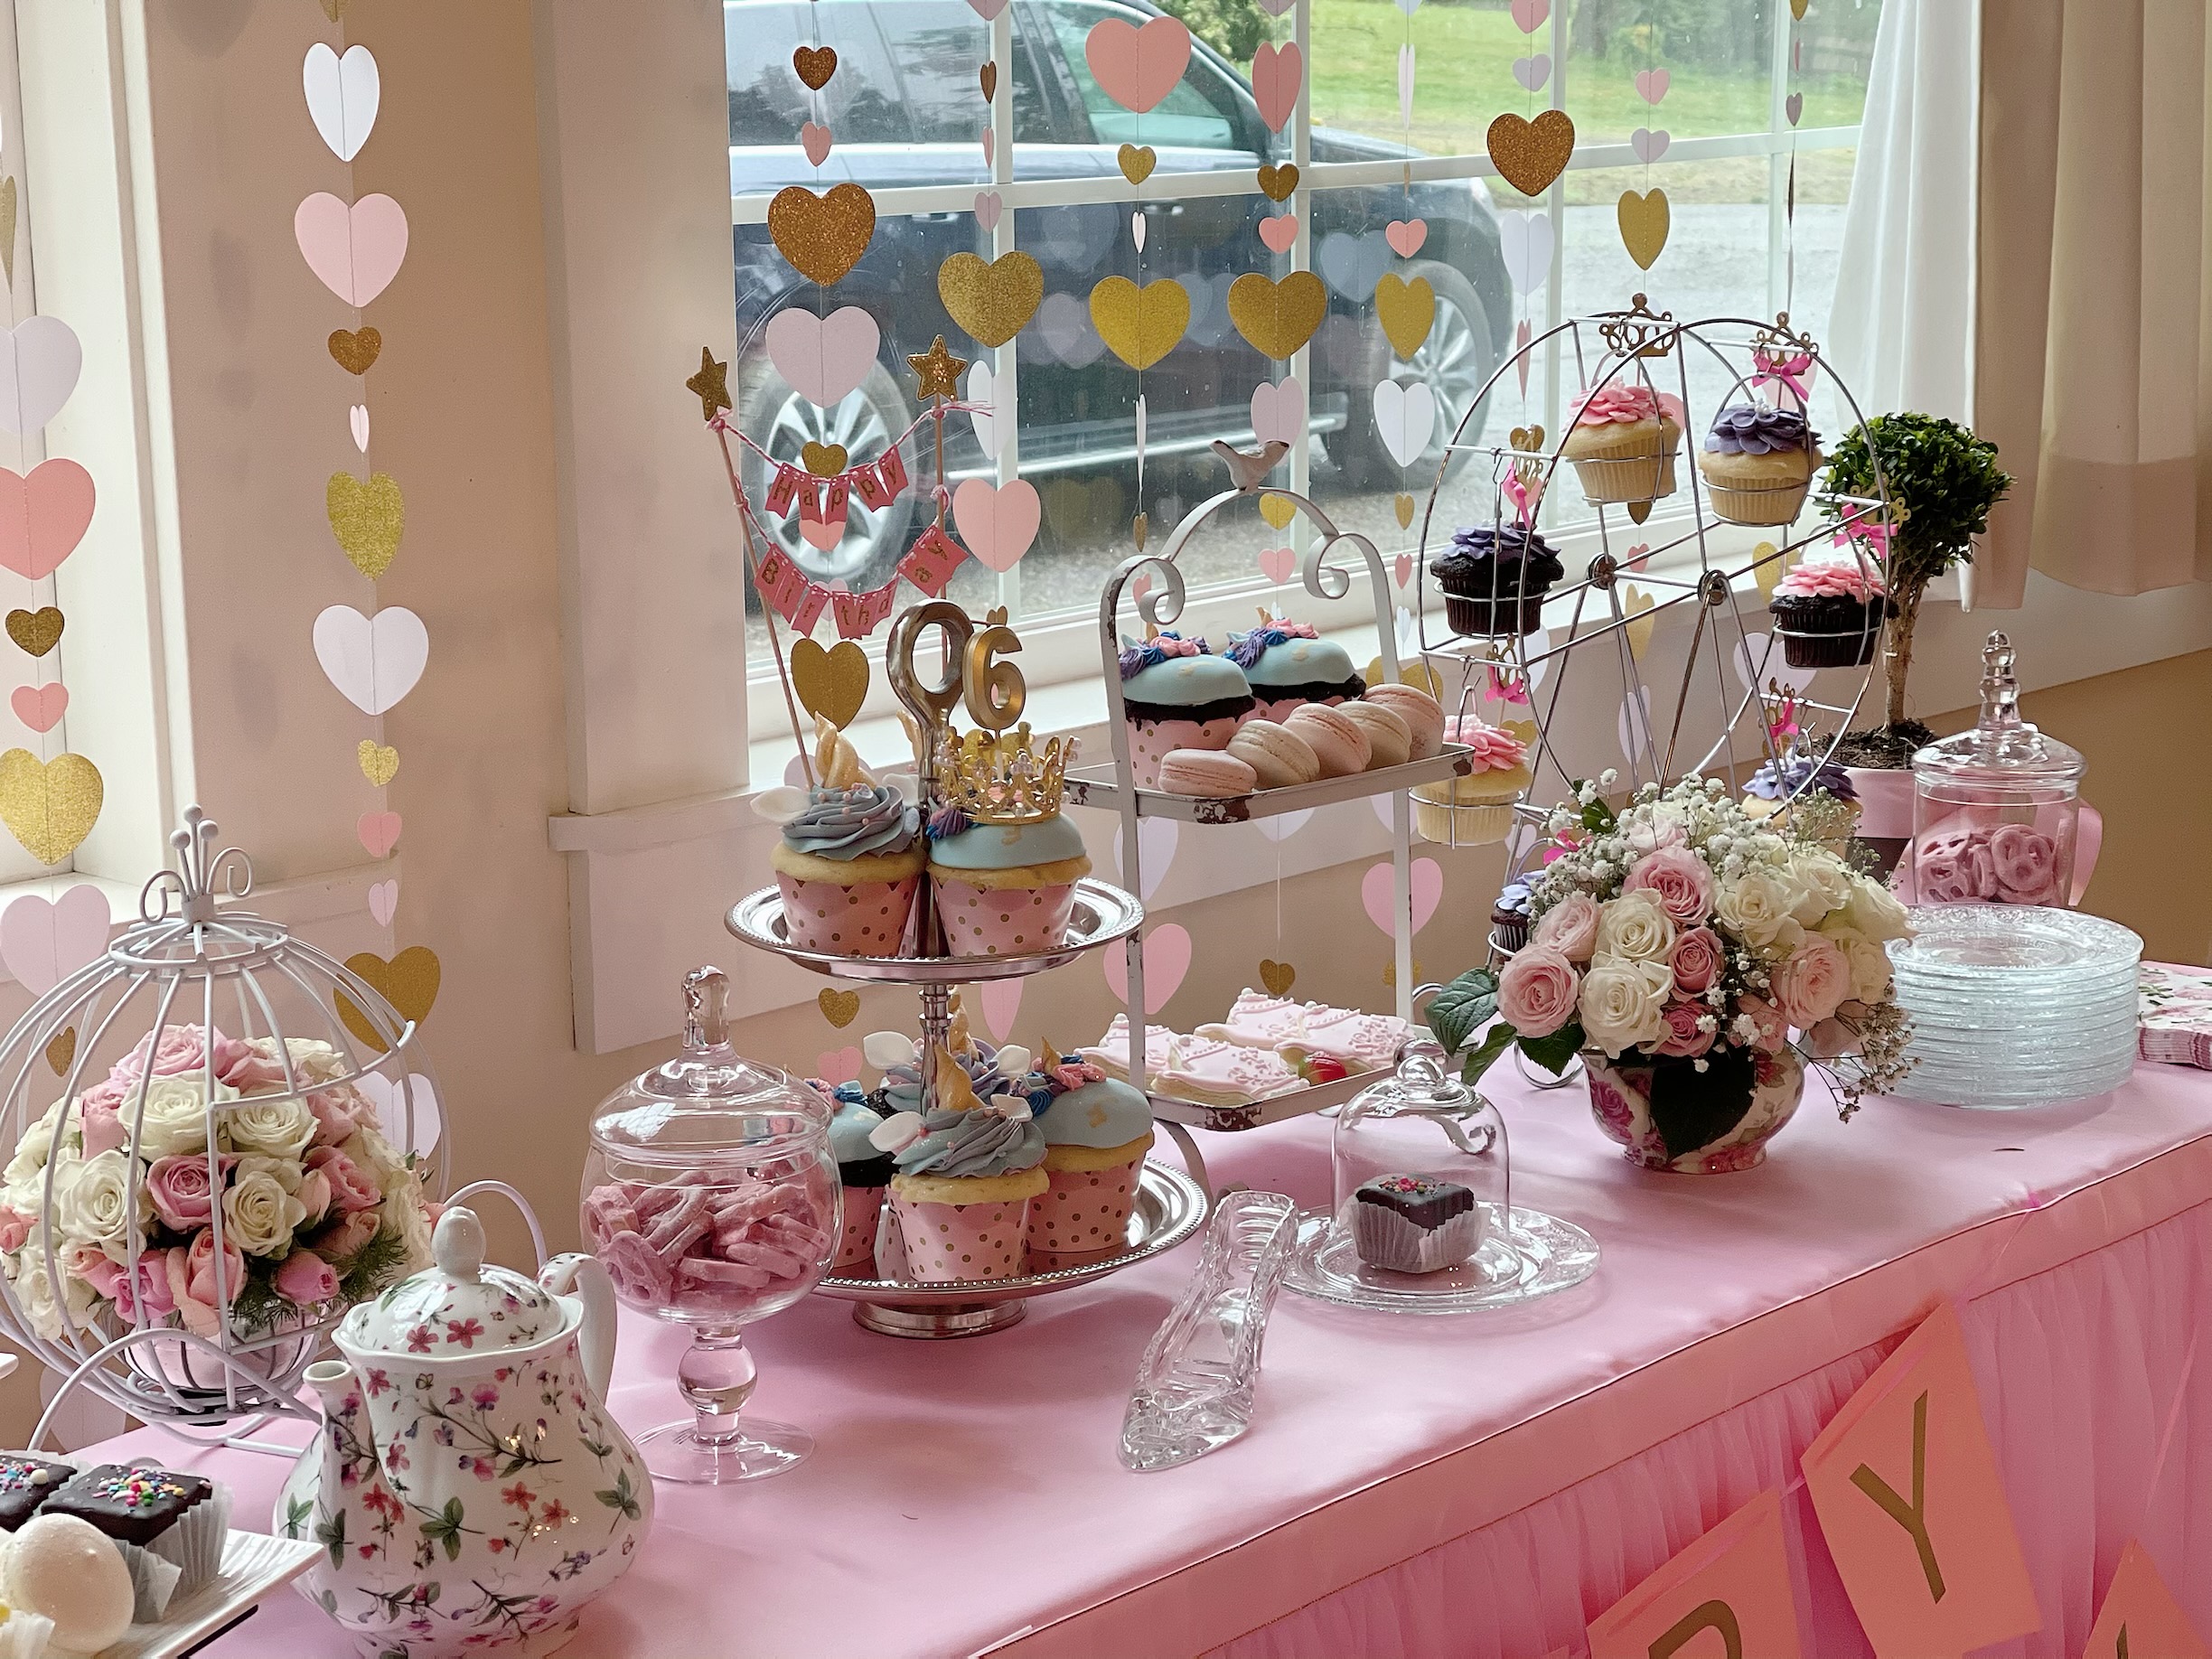
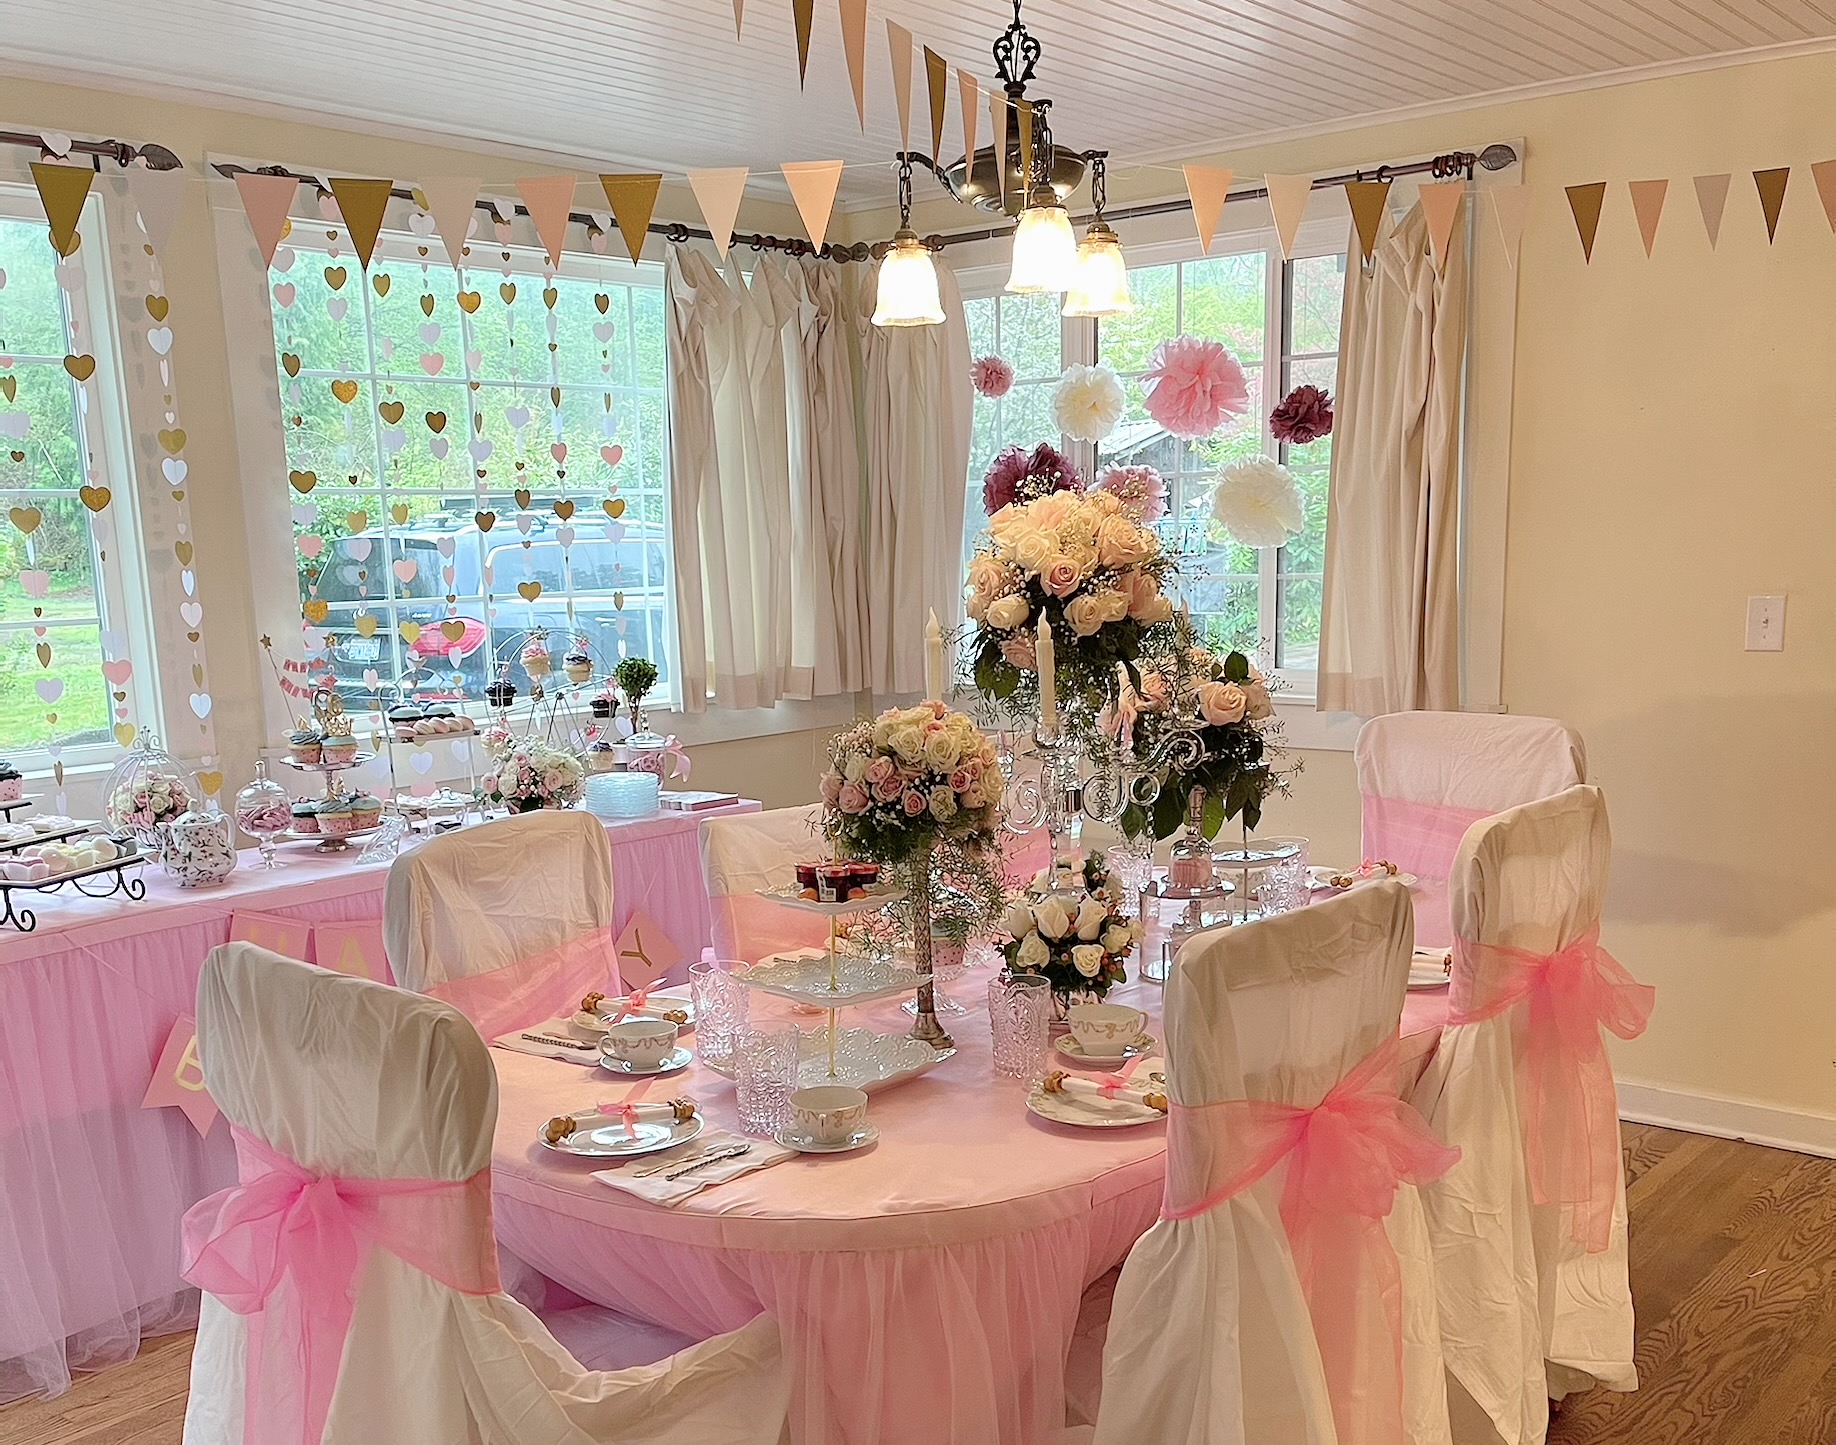
All in all this was not a difficult look to achieve. The pink satin tablecloth, pink tulle skirt, heart streamers, and birthday banner are all available via Amazon and can be reused over and over again. Also the chintzy tea pot was found at Home Goods – my new favorite store!
One lump or two?
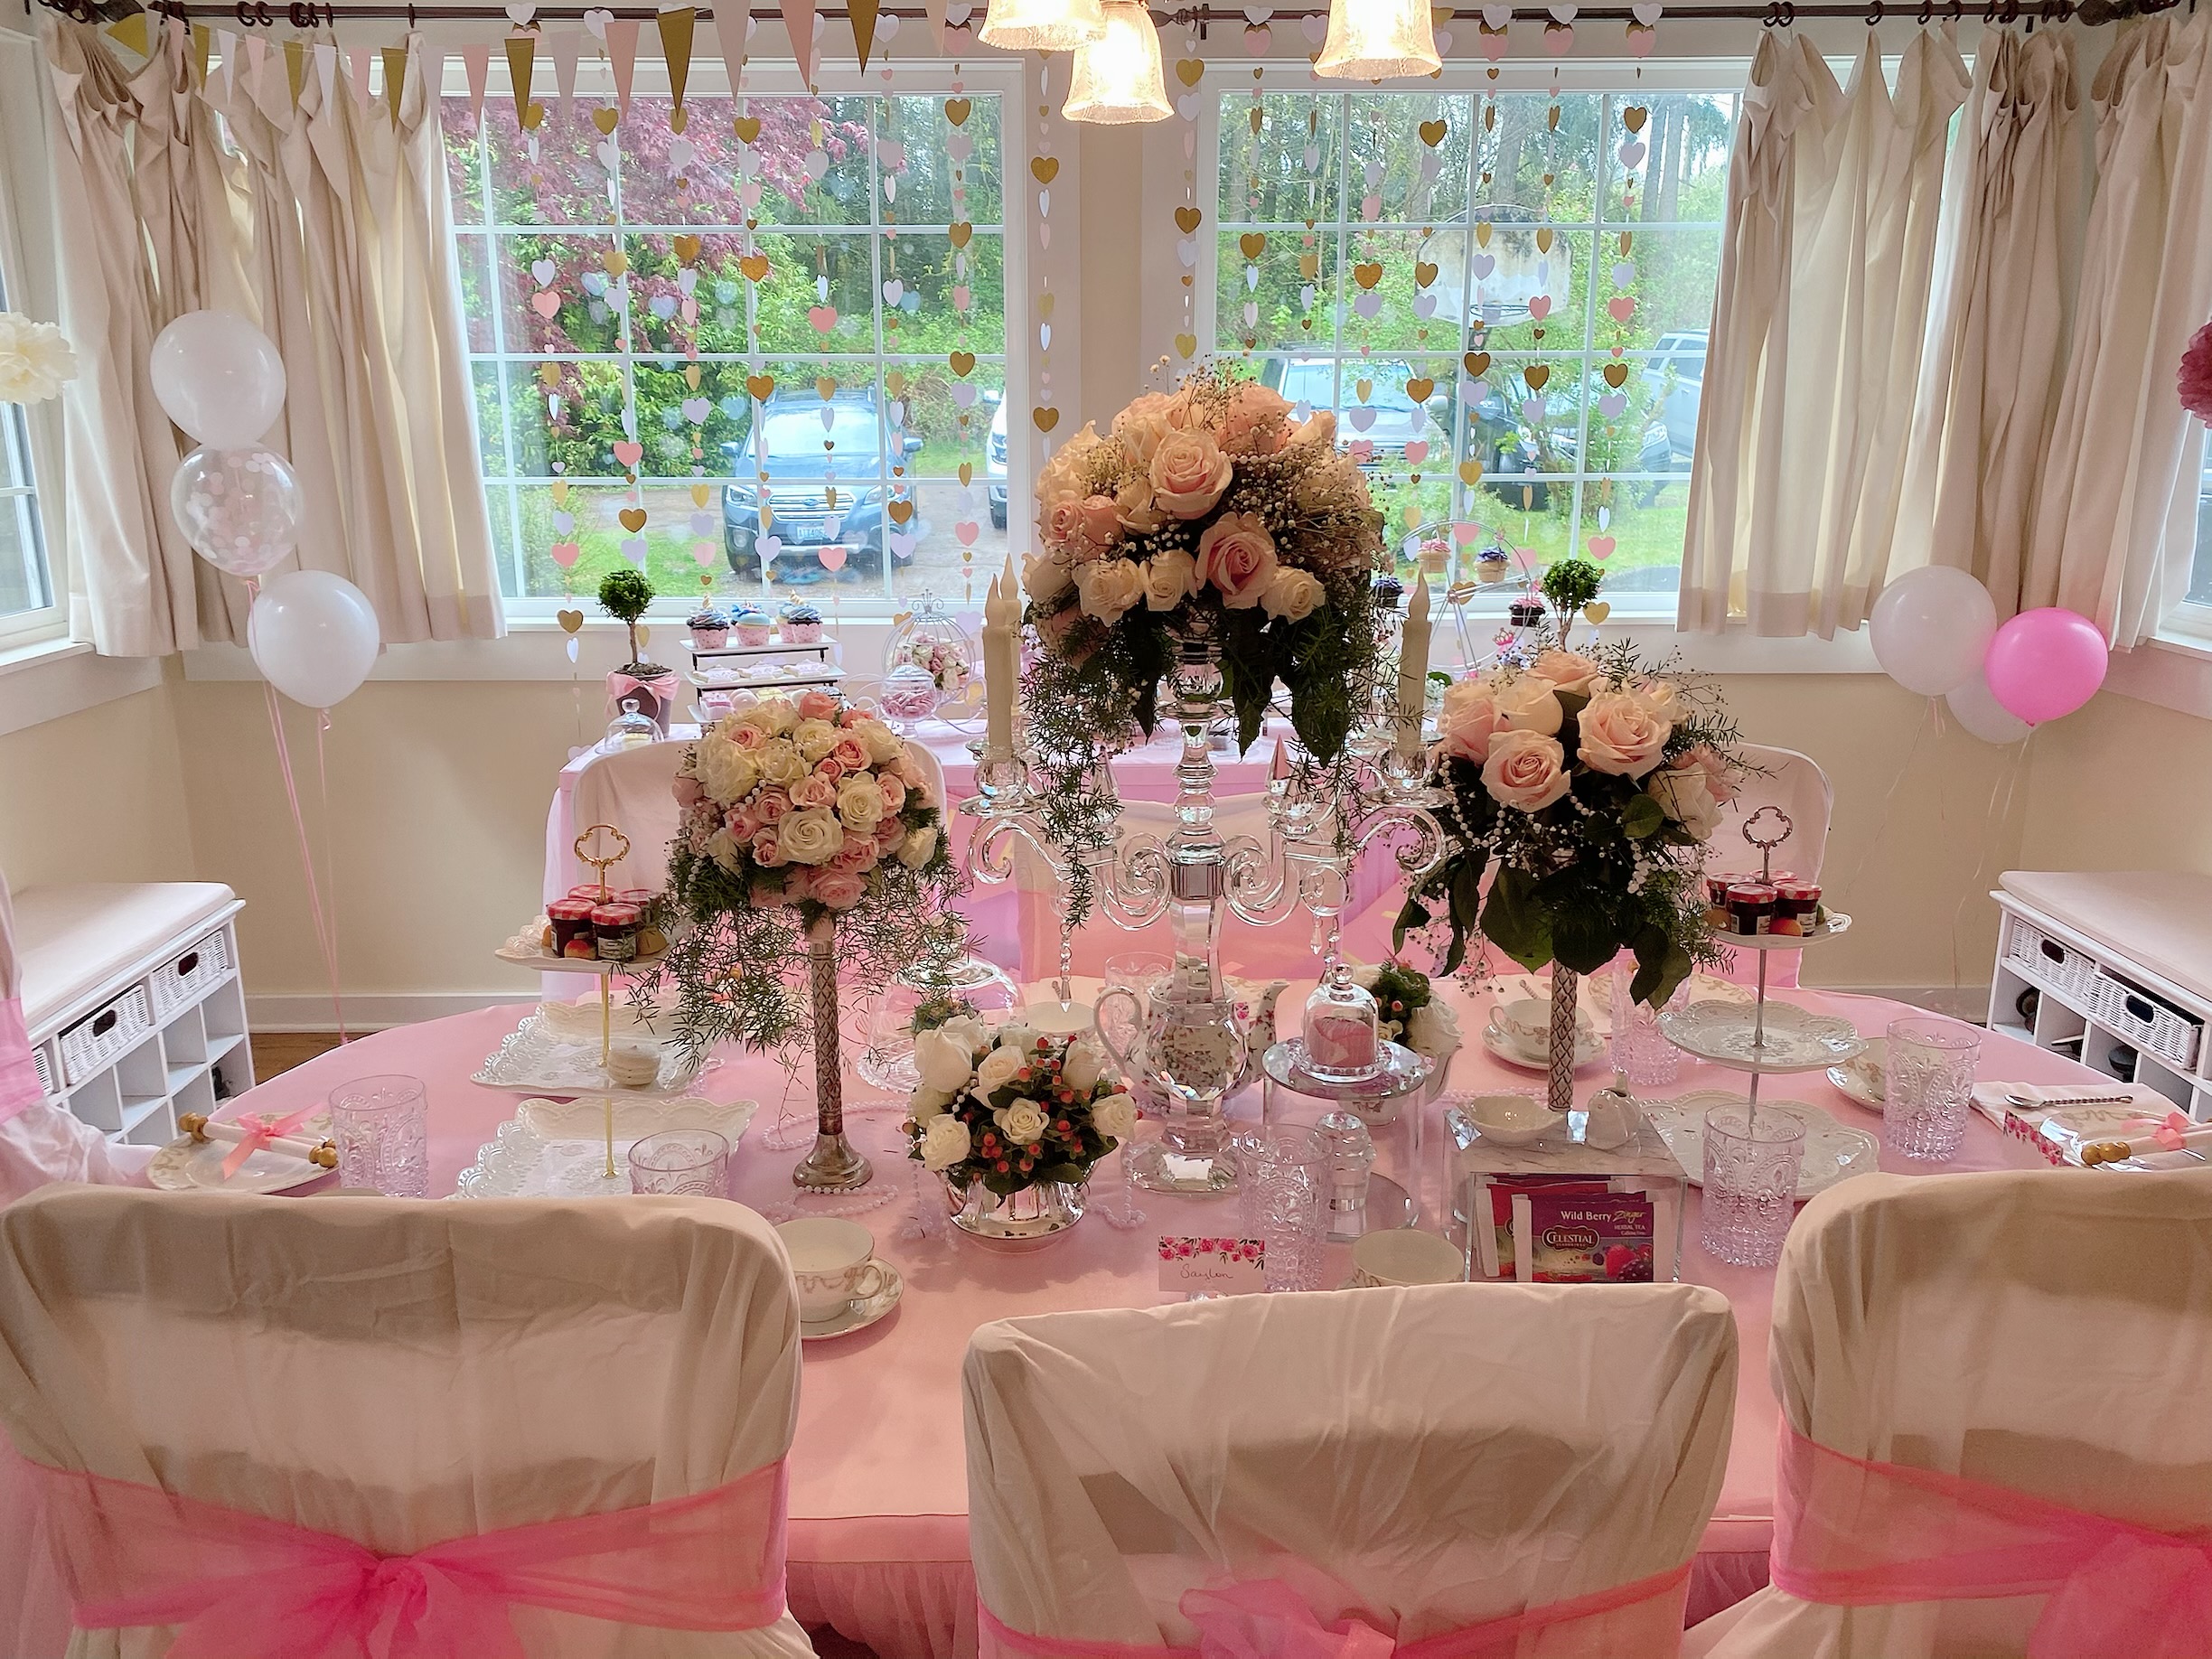
My mother really out did herself with the floral arrangements. Buying the flowers from a local area wholesaler was not only a huge cost savings, it provided us with the ability to create our own look and style.

I was able to provide my mom with some photos of my vision and she was able to replicate it using floral foam and floral bowl adaptors for candle tapers which we placed on some of our candle sticks and on a cut glass crystal candelabra we found at Home Goods.

As a special treat we incorporated a family heirloom into the mix and used my great great grandmother’s china, which had been sitting on a shelf for decades. Place settings were kept simple with linen napkins with demitasse spoons and butter knifes. We found some fun plastic cups that looked like vintage press glass for drinking glasses. Name cards with faux jeweled diamond place holders made the place setting fun

For an added touch of elegance and fun, we did a custom made menu in the form of a scroll which we got through Etsy. The mom and girls really had enjoyed opening the menu and reading what was in store for the tea. Cute touch of fun!
My daughter and I had a lot of fun looking through the charity shops for old pink depression glass plates, glass dome cloche covered dishes, and tiered plates to use on the table.
Practice Makes Perfect …
Remember the etiquette lessons that my Mother-In-Law (aka the Fairy Godmother) taught the girls earlier? Well, now they each got the opportunity to practice what they learned … and when the girls learned that their Fairy Godmother would be watching them, and those who displayed proper etiquette would receive their own rhinestone tiara … every girl immediate at attention and listened!

Practicing manners …
I have never been more impressed with how well behaved 8 little girls could be at a tea! Would you believe not one spilled a single drop of tea nor did they leave a single stain! Each one execute flawless manners and etiquette enjoying homemade scones with strawberry jam. PB&J crown finger sandwiches with herbal caffeine-free fruit tea.
The Queen Mums were super engaged with their little princesses and really were a wonderful help during the even each jumping in.
I hear by declare you are a princess!

Inspired by some other parties shown on Pintrest … I created the above certificate in PowerPoint and customized one for each of the girls and printed them off at home. Once the tea was over, the Fairy Godmother presented each of the little princesses with a certificate and their very own tiara which they all LOVED!
After the tea the girls did a fashion show for the mothers – showing off their princess walk, wave, curtsy, tutus, tiara’s and jewels. The fashion show was another highlight of the party which the girls and mothers loved!
Let them eat cake!

Hands down easiest way to distribute birthday cake!
Fairy Godmothers do exist!
Again, my mother-in-law was the perfect Fairy Godmother and truly embraced the role. It was so touching to see how much the girls connected with her and each one of them gave her hugs when it was time to leave.
Happily ever after …
What an amazing group of friends and incredible moms!

Classroom Easter Favors
Hopping into the joy of Easter!
Waking up and finding that the Easter Bunny had left me an easter basket was one of my favorite memories as a child and a tradition I have really enjoyed passing on to my children. This year, as the Classroom Coordinator for my daughter’s Kindergarten class I had a lot of fun letting my imagination loose.
Traditionally the students receive a sweet fun little treat bag for Easter, but this year I really wanted to give the students in my daughter’s Kindergarten class something unique – especially after what we’ve all been through and having missed out on this lovely holiday the year before due to the COVID lock-down, so in addition to the fun little toys and treats, I partnered with their teacher to get photos of each of the students acting as if they were pushing or breaking out of an egg! The results came out cuter than I expected!
The execution of said effort was easy and fun and provided a wonderful creative outlet for me. What more the smiles and joy on the faces of the students made it totally worth it!
Easter egg surprise


Supplies:
- Plastic easter buckets. Party City sold sets of 12 which came in three colors.
- Photo print outs. Once you know the size of bucket you are working with, you can scale the photos to fit and print them off. I printed the student’s photos off at home on our printer, but you can also upload and have them printed at a nearby photo center like Walgreens or Wal-Mart which are very affordable.
- Easter grass. I prefer the crinkle paper to the plastic – as it displayed nicer
- Poster board. I picked up some plain white poster board at the Dollar Tree and used a sample cut out of an egg that traced over and then cut out and glued to the bucket that I then placed the student’s photo in to make it appear as if they were breaking out of the egg.
- Dye-cut paper eggs. I put a dye-cut easter egg on either side of the egg with the student’s photo to add contrast and a pop of fun color.
- Fluffy chicks. Oriental Trader had sets of these multi-colored chicks which I added a fun and cute touch.
- Glue dots. These are the best! This was the best product I could find for adhering everything to the plastic buckets!
- Plastic Gift Bags. Oriental Trader sells these in sets of 12 which was perfect, as all I had to do drop the finished bucket in the bag and tie it!
- Ribbon. Again Oriental Trader for the win here! They sell a set of fun multi-color satin ribbon which added a pop of color.
Fillings:
It is always fun finding neat treats and toys to fill easter baskets! We did our best to be mindful of avoiding too much sugar, so we filled the baskets with:
- Annie’s Bunny Crackers
- Welch’s bunny gummies
- Cotton Tail cheese poofs
- Bubbles
- Pull back and let go bunny
- Stickers
- Puzzle
- Coloring book w/ crayons
- The cutest and softest stuffed bunny from Oriental Trader! After all, how can you possibly have an easter basket without a bunny?!

Classroom Christmas Favors
They are all little angels
This year more than ever we needed the Christmas Spirit! We all have been hard hit by COVID and as we go into the holidays it’s nice for the students to have activities to do rather than a bag full of sweets. Also, to prevent arguments over who’s bag belongs to who the problem is solved by personalizing each student’s bag with their photo on it!


Supplies:
- Photos of the students. Again we have the best Kindergarten teacher who is so sweet to work with me on these fun holiday treats – she captured photos of each of these little angels (without masks this time!). As I was trying to achieve a ‘bobble head’ look and feel, I scaled the images of the student’s faces larger than I would when I printed them out.
- Plain Kraft Paper Bags. I choose brown as it showed off the angel wing better, but you can use any color bag you like.
- Blue felt. I picked up a couple of sheets of blue felt at the craft store to use as a body. These were easy to cut out as long narrow triangle shapes and trim them down accordingly.
- Angel Wings. I found these cute fabric angel wings on Amazon. They come joined, but I cut them apart so I could get the effect that the angels are flying.
- Stars. I also found these glittery foam stars on Amazon. They were easy to use as they were just peel and stick. If I were to do this again, I would go with a smaller size star. I tried finding smaller sizes online but unfortunately they were all sold out.
- Feathers or feather boa. To give the look that our little angels are floating on a cloud, I picked up a thin feather boa off Amazon and cut it down and hot glued it to the bag. It feathers added the texture and 3D look I was aiming for, but be prepared to have a broom close by with a dustpan – those feathers go everywhere!
- Yellow Yarn. I used a fuzzy yellow yarn for the halo to complete the look. This did not work out as well as I had hoped and they were the most challenging thing to adhere to the bag. I would probably work with a different material if I did this again.
Filling:
My daughter helped me pick up fun activities, toys, and treats to put in the holiday gift bags which included:
- A halo headband
- Christmas activity book and crayons
- Candy cane
- Reindeer stuffy
- Stickers
- Peppermint Chinese yoyo

Teacher’s Gifts
Student’s Christmas Gift to Teachers
This year more than ever I wanted our Kindergarten teacher and her Educational Assistant to know just how much we appreciated them, especially after the year we had with remote learning with non-independent learners.
I wanted to create a gift that included each of the students, but how do you get 24 students handprints on one plate?! Our daughter was the one who came up with the idea to have everyone put their fingerprint on something to give to the teachers … and fingerprints can look a lot like Christmas ornaments!

Our local ‘Paint Your Own Pottery’ is amazing! They helped me pick out the cups and then put together a kit for me that included a variety of colors.
It took a few attempts using a pencil, but I eventually was able to sketch out a design that worked where I could space out each of the 24 student’s fingerprints with their names underneath so we knew who was who.

Once the template was finalized on the cups, I worked with another parent who was nice enough to help me capture each of the student’s fingerprints with the pottery paint. We wanted this gift to be a surprise so we made the students promise not to tell the teachers what we were making.

The final result was a success! Both the student’s Kindergarten teacher and her EA were surprised by this fun coordinated effort which allowed the students to all participate and show how much the appreciate everything they do for them!

Easter Footprint Plate
Annual Easter Plate

This year we decided to combine our son and daughter’s footprints together to create a fun bunny footprint creation! Making these plates are always fun and both our kids have been great at doing these with us every year.
This year we chose a bunny theme which was very easy to do. I added some fun flowers and easter eggs in the background to give the bunny-foots a place to hop around in. A simple rim design gave the plate a pop of color and framed the scene nicely.
This can be done at any area ‘Paint Your Own Pottery’ shop. They have all the supplies you need. They usually have a huge selection of plates, platters, etc. They will fire your work when you’re done and call you when it’s ready for pick up.
This larger plate (as our kiddo’s feet keep growing) ran us about $30.
Fall Pumpkin Decorations

Using some of the examples posted on Pinterest (e.g.: https://www.pinterest.com/pin/573223858804166326/) I went to my local craft store and found some latex transfers. This was such an easy project! I was able to simply rub the transfers onto the pumpkins. No cutting, no worrying about our toddlers poking their fingers into them and/or cutting their fingers. They loved rubbing the paper and seeing the magic of the images come off on the pumpkins.
Great option for parents with small children! We live in an area where pumpkin patches are everywhere and so inexpensive. Our little guys picked out their own pumpkins and decorated them when we got home. No mess – no fuss!
Materials:
$15.00 Pumpkins
$10.00 Latex Harvest Blessings transfer
$ 5.00 Latex pumpkin face transfer
$ 8.00 Latex Boo Transfer
$ 2.00 Latex spider transfer
======
$40.00
Heirloom Child Footprint Easter Bunny Plate
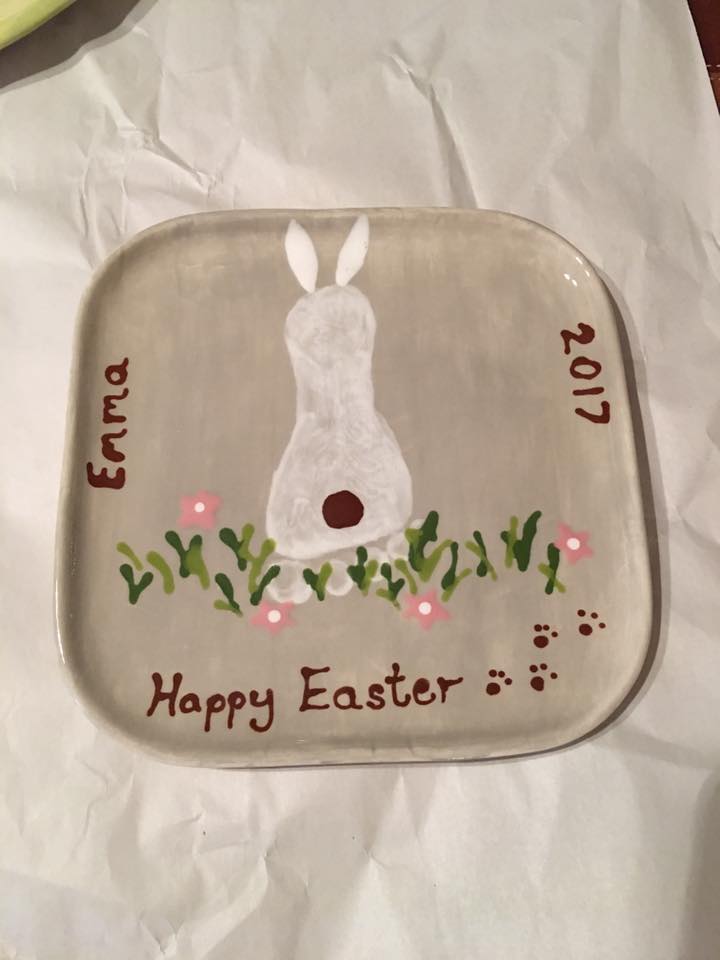
Inspired by the canvas print I saw on Pinterest, https://www.pinterest.com/pin/351912451841921/ – I thought I would TRY and see if my little 21 month old would let me do this on a plate … it took a few attempts, but eventually it worked. It helped to have family and friends with me to take her afterwards.
I walked my daughter through the process … she was VERY good at letting me paint her foot and press it against the plate, but then she wanted to curl her toes … that was the challenge. Touching it up was the trick. It turned into a rush job – as she started to melt down … note to parents who try this, don’t do this around nap time. Thanks to family / friends was able to knock this out quickly.
Materials:
$25.00 pottery plate
$0.00 pottery place provided all paint/brush supplies and cost for firing plate.
======
$25.00
Heirloom Child footprint Easter Plate
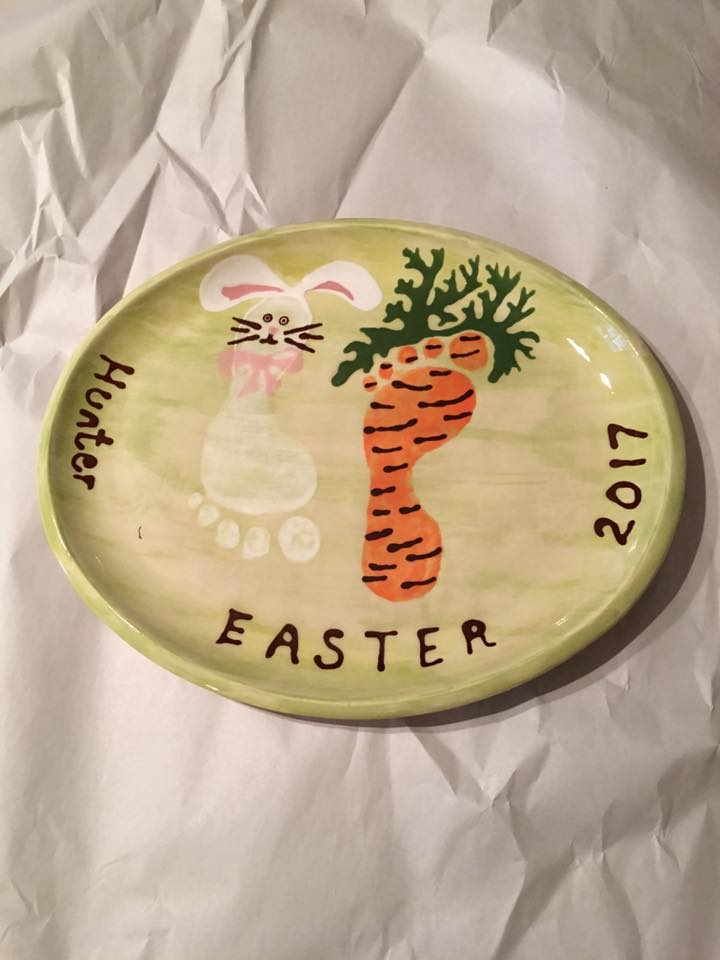
Inspired by the Easter footprint example on Pinterest, https://www.pinterest.com/pin/44613852531120415/, my family and I visited a paint your own pottery place and tried to replicate the concept.
With the help of my son, I was able to walk him through what we were going to do – and what we were going to make. He’s 3.5 yrs old now – and has a better understanding what’s involved in the process now. There for awhile we had to take a break from taking prints – as he didn’t really understand what was going on – now he’s into it!
So it was helpful to have baby wipes on hand and family/friends to help. I explained that the paint would feel cold and damp, but we are going to make a carrot and bunny out of his footprints and he was very excited. It took 5 minutes to do both foot prints – and he was very good to be very still when we did them. A week later when we picked up the plate – we were really happy with the results!
Materials:
$35.00 pottery plate
$0 pottery place provided all paint/brush supplies and cost for firing plate.
======
$35.00
Recover Kitchen Chair Seats
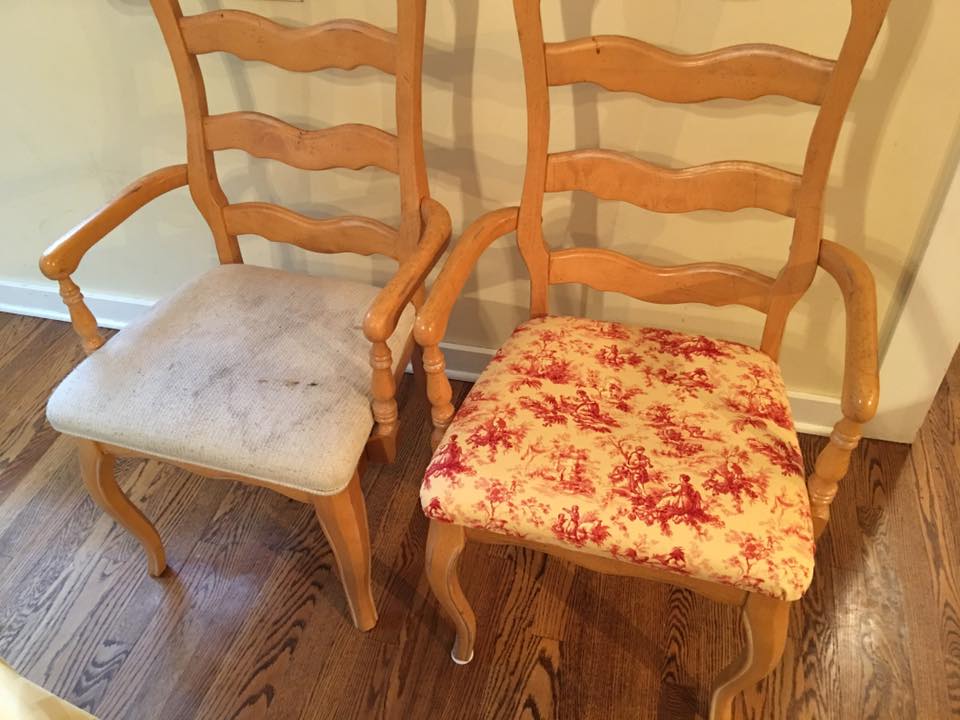
We purchased our kitchen table and 6 chairs off of Craigslist when we moved into our house in July 2013. I told my husband when we bought the chairs I could recover them … two children and a number of food stains later I finally got around to the task!
It whole process took all of about 1.5 hrs using just a Philips screw driver, staple gun and pair of scissors. Oh – and a little bit of help from my in-laws who kept our little guys busy while is stapled away.
The material was the only expense I had for this project – which I purchased at Wal-Mart. Who knew Wal-Mart sold Waverly fabric?! Anyway – I took a gamble and bought 8 yards of the material hoping it would cover all 6 chair seats … I was conservative with the fabric and had enough left over to make a few throw pillows to use in our window seat in the kitchen so bonus!
Family is very happy with the results and our toddlers are busy working on the next set of stains for me to recover in another few years, but oh what a different!
Pinterest inspiration: https://www.pinterest.com/pin/43910165097005884/
Materials:
$20.00 Fabric – 8yrds (Wal-Mart)
$ 0.00 Staple Gun and staples
$ 0.00 fabric scissors
======
$20.00 Total
