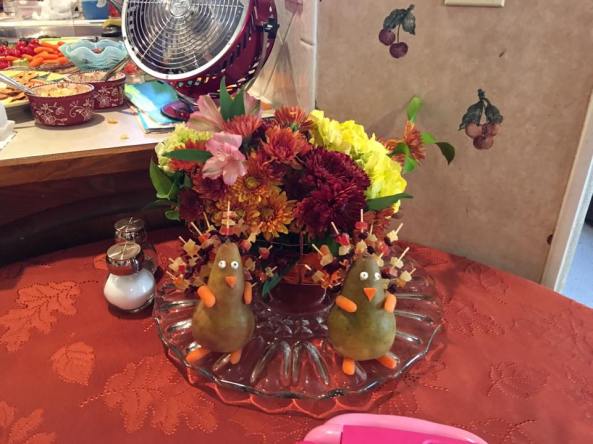
Was tasked with providing the decorations at this year’s Thanksgiving, so I went on Pinterest to look for inspiration and what I found was the following: https://www.pinterest.com/pin/455285843564782516/
So armed with this vision I found on Pinterest I went to the grocery store … and I started searching … and searching … and searching for anything ‘dried’ to create the tail portion of this cute little decoration … finding dried mango, dried cherries, dried anything is tricky in Texas grocery stores (unless it’s outside). So I found myself improvising on some of the items – for starters my pears are not green, but rather brown, which I was good with – because after all, who has ever really seen a green turkey (as was in the Pinterest example)?!
Once I found the baking aisle I started sifting through all the dried fruit options and thinking through what I could use that would fit in with this … I settled on dried cranberries, dried pineapple and raisins … less cutting and easier to thread on a toothpick … and note to anyone who tries this – get the GOOD toothpicks! Don’t get the flimsy ones I did without thinking … they are impossible to stick into the pears without breaking – fortunately my sister-in-law had some good sturdy toothpicks I was able to use instead.
I couldn’t find any of these ‘candy eyes’ that the other person used, so I got some white candy pearls and used those as eyes a black frosting gel for the dot which made up the eyes.
Kids love to help! And my sister-in-law was really grateful that I had a project that kept her 7 yr old daughter busy … my niece and I had a blast making these little guys and she was quick to create the toothpicks with the fruit that created the tail on the pears.
These little guys added to the fun and were a cute addition to the kids table. Fun holiday project and easy to do!
Materials:
$25.00 Pears, dried fruit, toothpicks, baby carrots, candy pearls & black frosting gel
======
$25.00 Total

